Blog

  • Why should I consider a security camera? A practical guide for homes and small businesses

    Security cameras aren’t just for shops and warehouses anymore. For many homes and small businesses, a well‑chosen camera can improve safety, reduce stress after an incident, and even help you understand what’s happening around your property day to day. This guide walks through the practical reasons to consider a security camera — and the important caveats so you set it up responsibly.

    1) Evidence matters (and memory is unreliable)

    After a break‑in, package theft, vandalism, or even a minor dispute (parking, noise, shared access), people often discover how fuzzy recollections can be. A camera won’t prevent every problem, but it can provide a clear timeline: what happened, when, and who was involved. That can help with insurance claims, reporting, and resolving disagreements faster.

    2) Deterrence (sometimes) and faster response (often)

    Visible cameras and signage can deter some opportunistic behavior, but deterrence isn’t guaranteed. Where cameras consistently help is response time: a motion alert that’s reliable and timely can prompt you to check what’s happening, contact a neighbor, or call for help sooner. The benefit depends on the quality of notifications and how you tune them.

    3) Everyday awareness (pets, deliveries, visitors)

    Many people buy a camera for “security” and end up using it for everyday peace of mind: confirming a parcel arrived, seeing whether a visitor is at the door, checking on pets, or reviewing a quick clip when you hear something outside. These simple wins are a big part of why cameras feel worth it.

    4) Common mistakes to avoid

    • Bad placement: pointing into bright backlight, mounting too high/low, or aiming too wide can make footage unusable.
    • Ignoring night performance: test your camera after dark; many look fine in daylight and struggle at night.
    • Too many alerts: unfiltered motion detection leads to “notification fatigue”. Use activity zones, sensitivity tuning, and schedules.
    • Weak Wi‑Fi: dropped streams and missing clips often come from poor signal strength. Consider a mesh node, better placement, or wired options.
    • No backup plan: rely on more than one layer where it matters (e.g., camera + good lighting + strong locks).

    5) Privacy and legality: do it the right way

    Security cameras can also create privacy concerns — for you and for others. A good rule is to record only what you genuinely need (your entrances, drive, garden), avoid pointing into neighbors’ windows, and be transparent if you’re recording a shared space. Depending on where you live, there may be rules about signage, audio recording, and how long you keep footage.

    6) What to look for when buying

    • Clear video in your conditions: especially low‑light and mixed lighting.
    • Reliable detection: fewer false alarms, better person/vehicle detection if available.
    • Storage you trust: local (SD/NVR) and/or cloud, with a clear retention policy.
    • Security updates: a camera is a computer on your network; choose vendors that patch and support devices.
    • Account protections: strong passwords, MFA, and sensible sharing controls.

    Bottom line

    A security camera can be a smart, practical upgrade if you set realistic expectations: it’s not magic, but it can reduce uncertainty and improve your response when something happens. Focus on placement, night performance, and alert quality — and treat privacy as part of “security”, not an afterthought.

  • Indoor Outdoor Camera System: What to Look For

    Indoor Outdoor Camera System: What to Look For

    Buying a camera that works well both inside and outside your home sounds simple, until you compare specs and realise that “indoor” and “outdoor” needs often pull in different directions. Indoors you care about clear faces, two-way audio, and easy app access. Outdoors you need weatherproofing, night vision that can handle reflections, reliable motion detection, and a setup that does not drop off Wi‑Fi every time it rains.

    This guide breaks down what to look for in an indoor outdoor camera system, how to prioritise features by location, and how to avoid common buying mistakes.

    Start with the real job: what are you trying to capture?

    Before you compare resolution and storage plans, decide what “success” looks like for each camera position. A camera aimed at a driveway has a different job than one monitoring a nursery.

    Typical goals include:

    • Identify a person (face clarity at usable distance)
    • Verify an event (package drop, door opened, back gate left ajar)
    • Deter (visible camera, spotlight, siren, or two-way audio)
    • Respond (talk to someone, check in live, call for help)

    A practical way to plan is to walk your property and note for each spot:

    • The distance to the subject (2 m hallway vs 12 m driveway)
    • Lighting conditions (bright window behind the subject, or pitch-dark side alley)
    • Mounting height and angle
    • Power availability (mains socket, USB, PoE, battery)
    • Wi‑Fi signal strength

    That context tells you which features actually matter.

    Image quality: resolution matters less than clarity in your lighting

    Most shoppers start with HD labels, but real-world clarity depends on more than pixel count.

    Lens and sensor performance

    A decent camera should handle:

    • High contrast scenes (for example, an entryway with bright daylight behind a visitor)
    • Mixed lighting (street lights plus shadowy corners)
    • Motion (people walking, cars passing)

    Look for review footage recorded in conditions like yours, not just daylight demos.

    Wide view vs detail

    A very wide field of view can reduce facial detail at distance. Some systems address this by combining multiple perspectives (for example, a dual-lens setup) or by adding pan/tilt plus zoom so you can inspect details during live view.

    If you are considering a model like Nakavision C1, features such as dual-lens HD monitoring and pan/tilt with 4x zoom are designed for exactly this trade-off: coverage plus the ability to look closer when needed. (Always verify how zoom works in practice, optical vs digital, using sample clips or independent reviews when available.)

    A homeowner standing at an open front door while a security camera mounted above the porch captures the entry area; the scene shows a clear view of the doorstep, driveway, and a second indoor camera covering the hallway.

    Night vision: it is not just “does it have it?”

    Outdoor incidents often happen in low light. When comparing an indoor outdoor camera system, night performance is one of the biggest differences between “usable evidence” and “blurry silhouettes.”

    Infrared (IR) night vision

    Many cameras rely on IR LEDs. A few things to check:

    • Range: how far the IR actually illuminates (marketing numbers can be optimistic)
    • Overexposure up close: faces can “white out” if someone is too near the lens
    • Reflections: rain, insects, or a nearby wall can bounce IR back into the lens

    Cameras with high-intensity infrared lights can improve visibility, but placement becomes more important, especially near gutters, glossy walls, or glass.

    Colour night vision and mixed lighting

    Some cameras use ambient light (street lamps, porch lights) to keep scenes in colour. If you already have good outdoor lighting, prioritise cameras that preserve detail and avoid smearing.

    Motion detection: AI features that actually reduce false alerts

    Motion alerts are only useful if they are accurate enough to trust. Outdoors, “motion” can be trees, shadows, pets, headlights, rain, and insects.

    Human detection and tracking

    Look for cameras that can:

    • Distinguish people vs general motion
    • Support tracking (keeping a moving person in frame)
    • Let you tune sensitivity and activity zones

    Systems that offer AI human detection and AI-powered tracking can significantly cut nuisance notifications. That is especially valuable for mixed indoor/outdoor use, where indoor motion may be constant (family, pets) but outdoor motion is what you care about most.

    Activity zones and privacy masking

    You should be able to block:

    • Public pavements/roads
    • Neighbours’ windows/gardens
    • Busy trees or flags

    In the UK, privacy is not just a preference. If your camera captures beyond your property boundary, you should review the ICO’s guidance on domestic CCTV (ICO guidance).

    Indoor/outdoor durability: IP rating and temperature tolerance

    For outdoor placement, weatherproofing is non-negotiable.

    Understand IP ratings

    An IP rating describes resistance to dust and water. For many UK installations, IP65 or IP66 is a common target. For example, IP66 generally indicates strong protection against dust and powerful water jets, which is useful for wind-driven rain.

    If a camera claims IP66 (as Nakavision C1 does), still confirm:

    • The power connector is weather-protected
    • Any junction box or adapter is also rated for outdoor use
    • The mount does not allow water to pool

    For background on ingress protection markings, see the standard explanation from IEC (IEC IP code overview).

    Build details that matter outside

    Small design choices make a big difference:

    • A hooded lens can reduce rain spots and glare
    • Better heat management helps prevent thermal throttling
    • A stable mount reduces shake in wind (shake can trigger motion alerts)

    Connectivity and reliability: the “camera is offline” problem

    A feature-rich camera is frustrating if it drops its connection.

    Wi‑Fi strength and placement

    Outdoor cameras are often farther from the router and separated by brick walls. Before buying, check:

    • Router location relative to outdoor mount points
    • Whether you need a mesh node closer to the camera
    • Whether the camera supports both 2.4 GHz and 5 GHz (range vs speed trade-offs)

    Remote access and app experience

    Remote viewing is a core requirement for most people shopping this category. Look for:

    • Consistent live view loading
    • Easy event timeline scrubbing
    • Clear notification settings (per camera)
    • Multi-user access options if you live with others

    A camera like Nakavision C1 highlights 24/7 remote access via mobile app, which is the sort of capability you want to validate through trial periods, return windows, and real user experiences.

    Storage and evidence: cloud, local, or both?

    Recording is where many systems differ most, and where ongoing costs can appear.

    Local recording (microSD, NVR, or hub)

    Local storage can be simple and cost-effective. MicroSD support is convenient, but consider:

    • What happens if the camera is stolen
    • Whether recordings are encrypted
    • How easy it is to export clips

    Cameras that support microSD plus local recording can reduce subscription dependency, but you still need to think about physical security and retention.

    Cloud recording

    Cloud storage can protect evidence if a camera is damaged or taken, and can make sharing clips easier. Compare:

    • Retention period
    • Clip quality (some services reduce resolution)
    • Export and sharing controls
    • Whether you can use cloud and local recording together

    If a device offers cloud and local recording (as Nakavision C1 does), that flexibility is often ideal: local for continuity, cloud for resilience.

    Two-way audio: useful indoors, surprisingly helpful outside

    Two-way audio is often marketed for indoor use (checking in with family), but it can be equally valuable outdoors:

    • Confirm deliveries without opening the door
    • Warn off trespassers
    • Speak to a neighbour who needs help

    Look for two-way audio intercom with clear audio and minimal lag. Audio clarity matters more than volume, especially outdoors with wind noise.

    Pan/tilt/zoom and dual-lens: when they make sense (and when they don’t)

    These features can be excellent, but they are not universal wins.

    Pan/tilt

    Pan/tilt can reduce the number of cameras you need, but it has trade-offs:

    • A camera looking left might miss an event happening right
    • Tracking can be impressive, but can also be distracted by multiple moving objects

    For high-traffic outdoor areas, many people prefer a fixed wide view plus a second camera covering detail angles. A dual-lens approach can help here if it provides simultaneous coverage.

    Zoom

    Zoom is most valuable when you need to check:

    • Faces at the edge of the frame
    • Number plates (note: capturing readable plates reliably usually requires careful positioning and lighting)

    A quick comparison table: what to prioritise by location

    Use this as a practical guide when building an indoor outdoor camera system.

    Feature Indoors priority Outdoors priority Why it matters
    Night vision performance Medium High Most outdoor incidents happen in low light; glare and reflections are common.
    AI human detection Medium High Reduces false alerts from weather, headlights, foliage.
    Two-way audio High Medium to High Indoors for communication, outdoors for deliveries and deterrence.
    Weatherproofing (IP rating) Low High Essential for rain, dust, temperature swings.
    Pan/tilt/zoom or dual-lens coverage Medium Medium Useful when you need flexible coverage without adding cameras, but can miss events if misconfigured.
    Storage options (local + cloud) High High Evidence retention and resilience if a camera is damaged or taken.
    App reliability and notifications High High The best camera is the one you can access quickly when it matters.

    Common mistakes that lead to disappointing results

    Mounting too high (or too wide)

    A camera installed very high with a wide-angle view can show “a person was there” but not “who it was.” For identification, you typically want a more direct angle and sufficient facial pixel density.

    Ignoring backlight and reflections

    An entry camera facing a bright street or morning sun can silhouette faces. Indoors, cameras pointed at windows often struggle. Look for real-world samples in backlit conditions.

    Overbuying features but underplanning Wi‑Fi

    Many “bad camera” experiences are really coverage problems. If your outdoor camera is two brick walls away from the router, plan for a mesh node or access point.

    Choosing storage without thinking about theft

    If evidence matters, local-only storage can be risky for exposed outdoor cameras. A combined local plus cloud approach can be safer.

    A practical buying checklist (copy/paste)

    When you compare products, keep your notes in one place:

    • Placement: indoor, outdoor, sheltered, exposed
    • Distance to target: close (0 to 3 m), medium (3 to 10 m), far (10 m+)
    • Night conditions: no lighting, some lighting, strong lighting
    • Weatherproofing: at least IP65 for outdoors (IP66 is a strong option for heavy rain)
    • Detection: human detection, activity zones, sensitivity controls
    • Recording: local (microSD), cloud, or both
    • Access: stable mobile app, multi-camera view, notification controls
    • Audio: two-way talk clarity
    • Coverage tools: fixed wide, pan/tilt, zoom, or dual-lens

    Where Nakavision C1 fits (as an example of a modern indoor/outdoor camera)

    If you are evaluating cameras with a “works anywhere” design, Nakavision C1 includes several features that align with the checklist above:

    • Dual-lens HD monitoring for broader coverage
    • AI human detection and AI tracking to reduce false alerts
    • Pan/Tilt and 4x zoom for live inspection
    • High-intensity infrared lights for night visibility
    • IP66 weatherproof rating for outdoor use
    • Cloud and local recording with microSD card support
    • Two-way audio intercom and mobile app integration for remote access

    You can explore the product and documentation directly on the official site: Nakavision.

    A close-up of an outdoor security camera mounted under a house eave in rainy weather, with visible water droplets and a clear view of the camera housing and mounting bracket; a faint infrared illumination is suggested in the scene.

    Final advice: match the system to the highest-risk moments

    For most homes, the best indoor outdoor camera system is not the one with the most features. It is the one that reliably captures the moments you would regret missing: a visitor at night, a package delivery, a side gate opening, or unexpected movement in a restricted area.

    Prioritise night performance, accurate human detection, dependable remote access, and storage you can trust. Once those fundamentals are solid, features like pan/tilt, dual-lens coverage, and two-way audio become meaningful upgrades rather than distractions.

  • Outdoor Security Camera System With Night Vision Guide

    Outdoor Security Camera System With Night Vision Guide

    If you are shopping for an outdoor security camera system with night vision, it is easy to get pulled in by headline specs like “4K” or “colour night vision” and miss what actually determines whether you get usable footage at 2am. Outdoors, you are dealing with changing light, rain and fog, Wi-Fi dropouts, insects triggering motion alerts, and wide scenes where the subject is often small.

    This guide breaks down how night vision works, what features matter most outside, and how to choose a setup that gives clear evidence-grade clips (not just bright, blurry silhouettes).

    What “night vision” really means (and why outdoor performance varies)

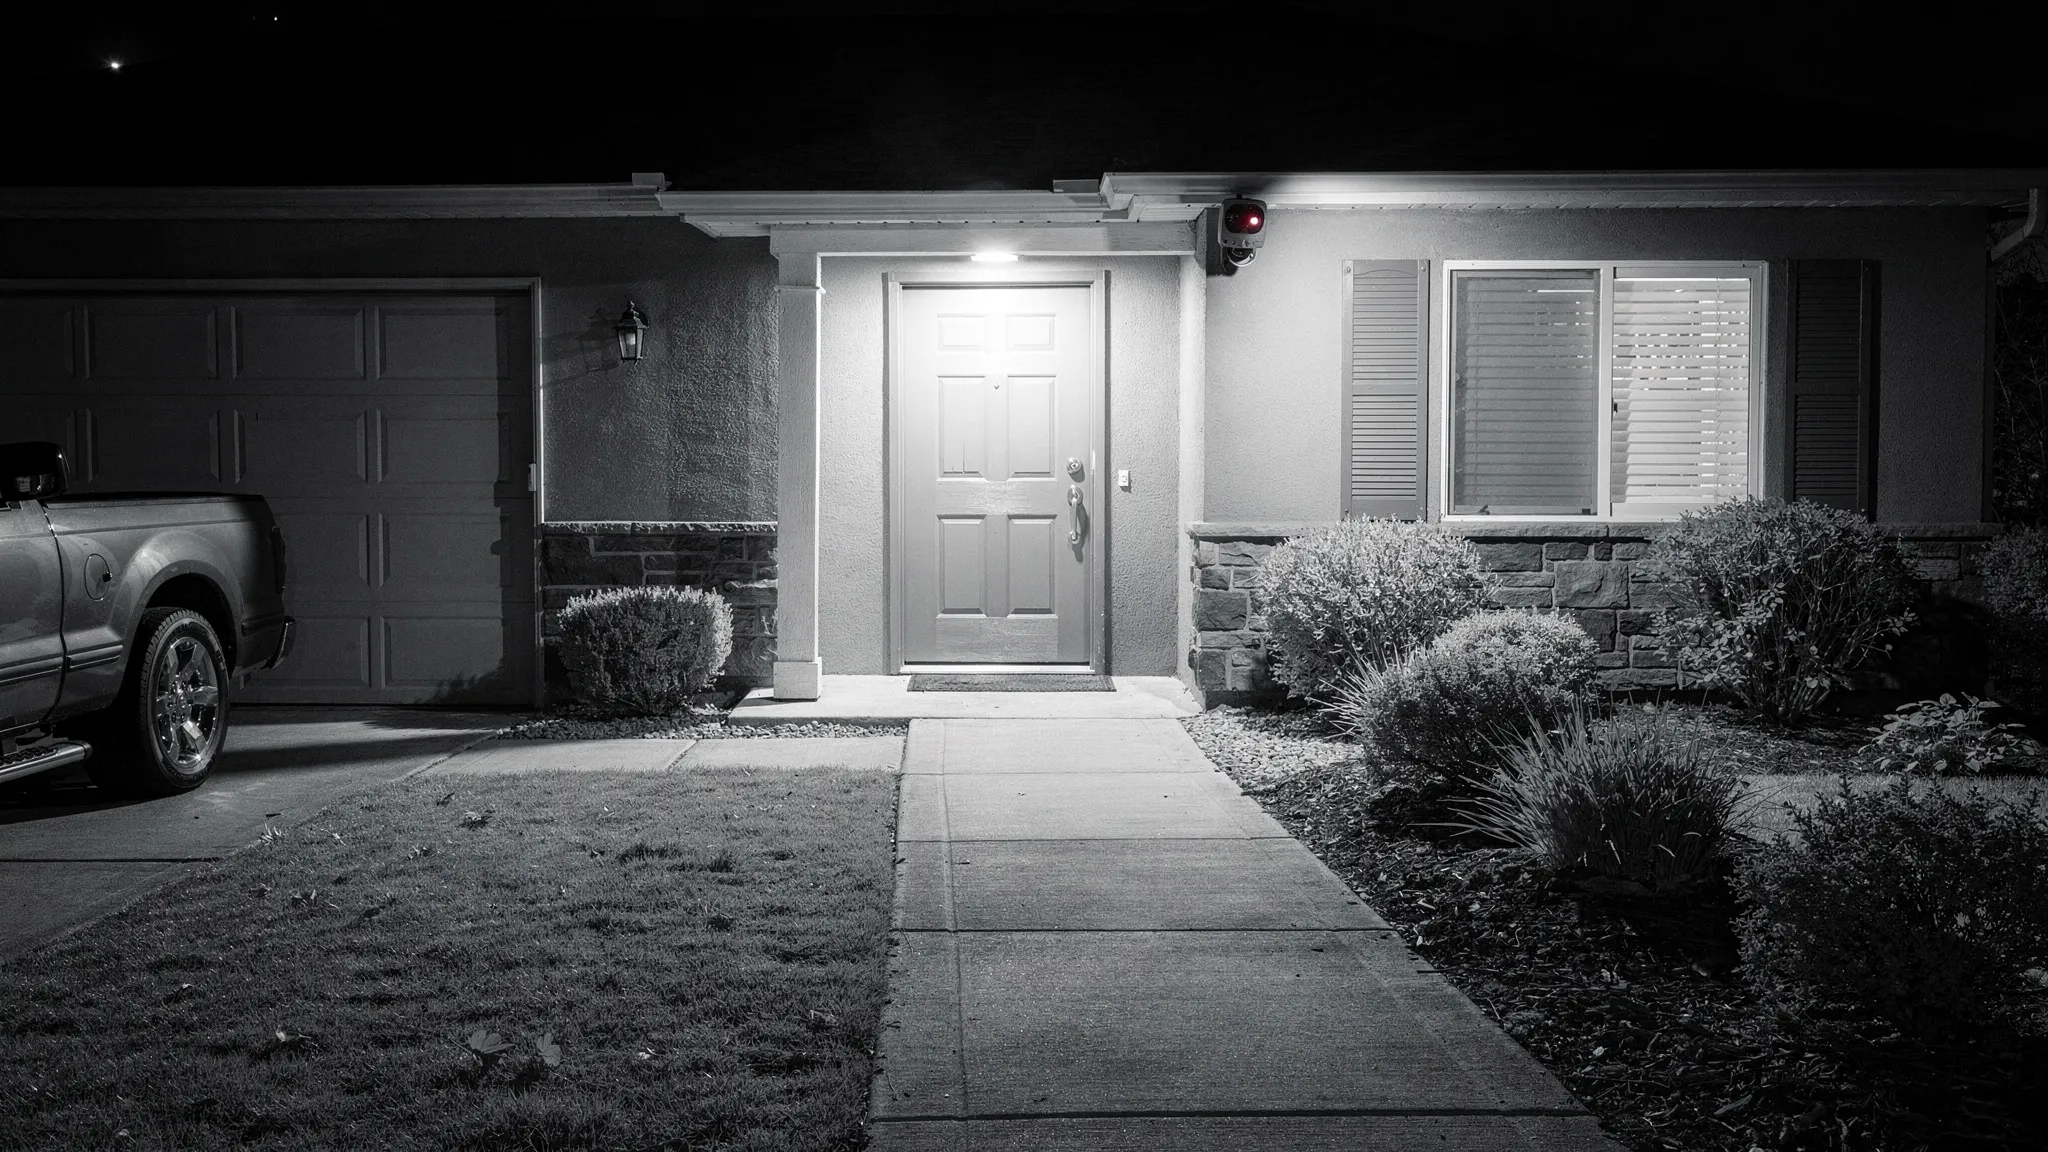
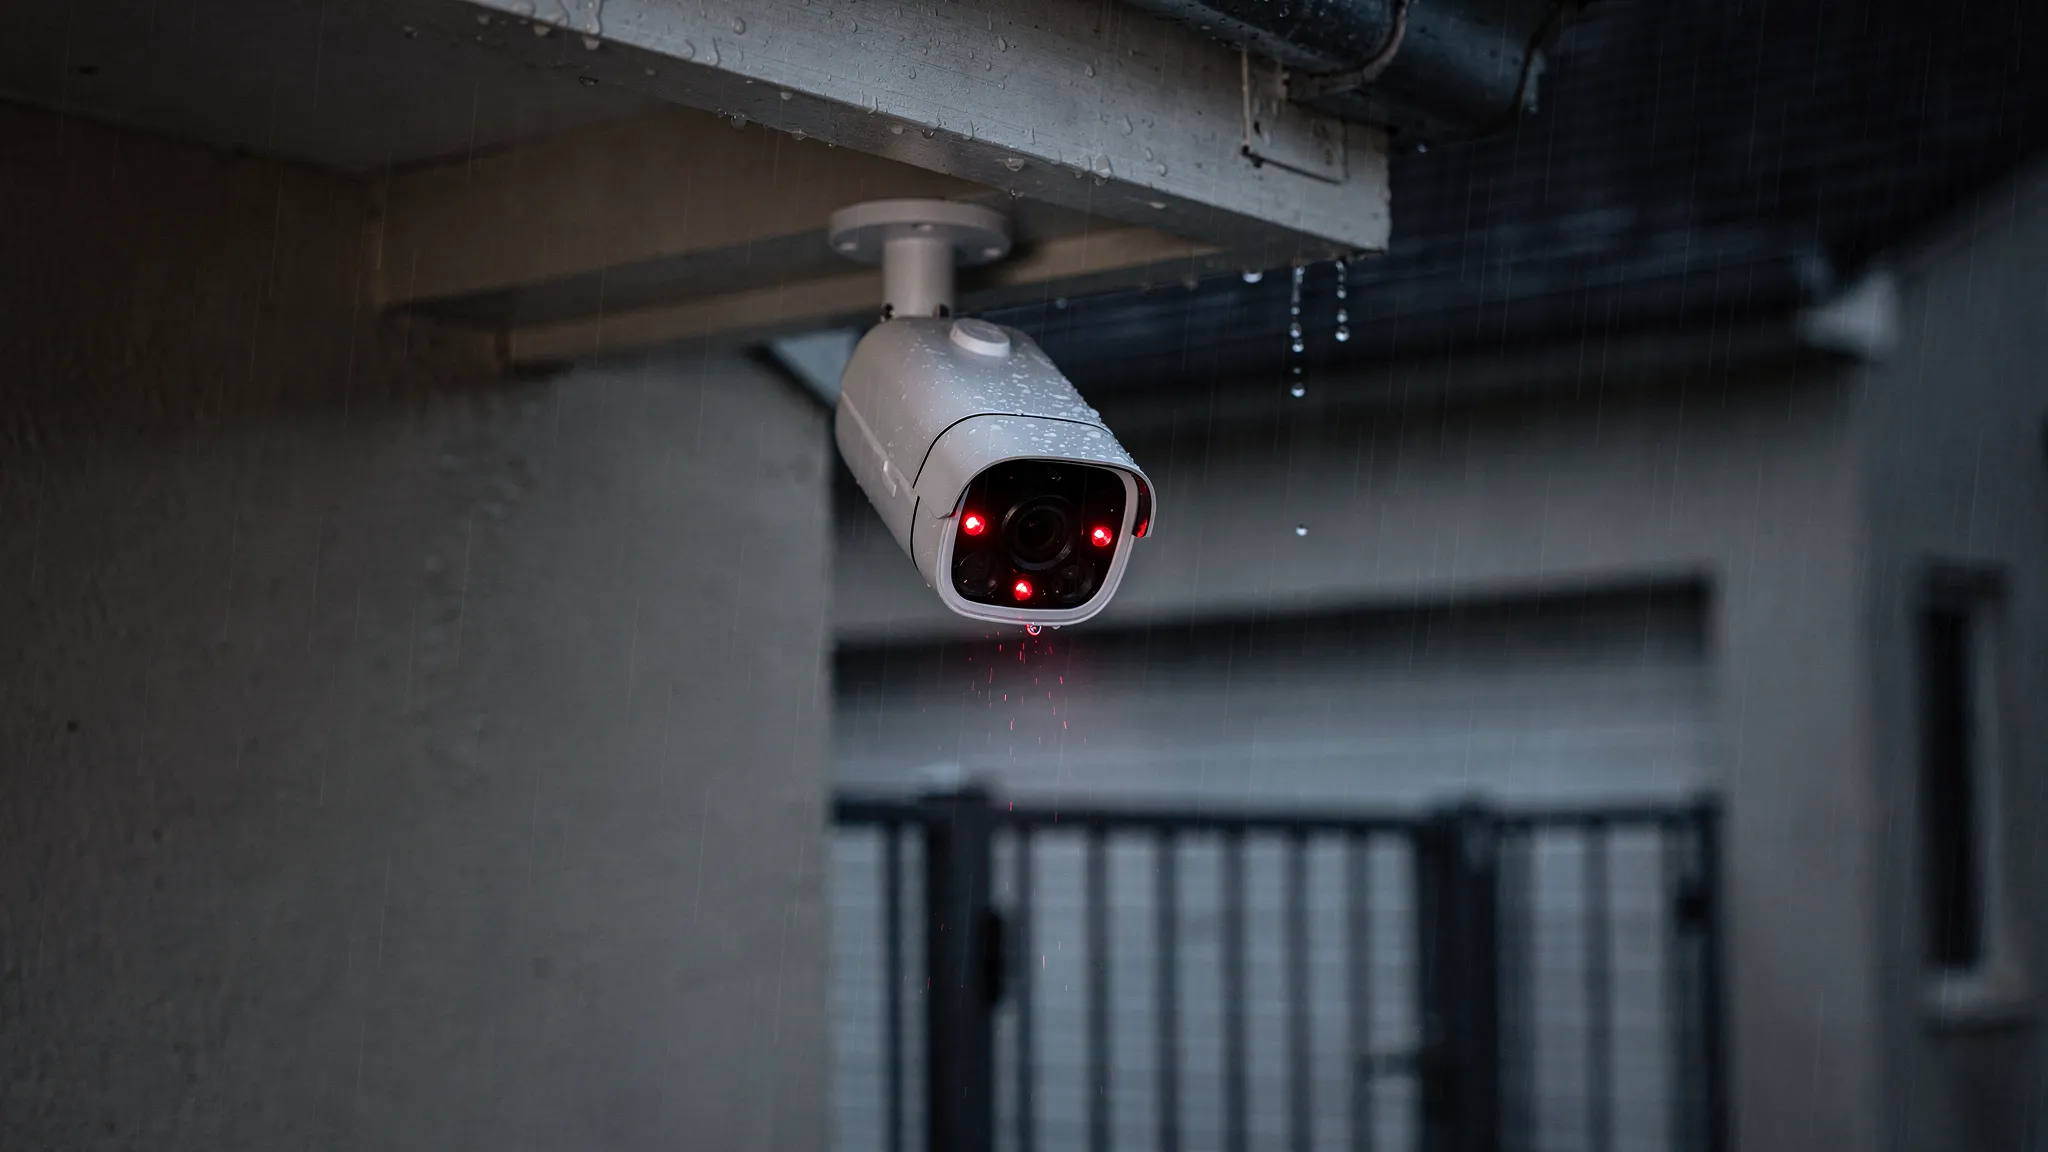
    Most night vision cameras rely on infrared (IR) illumination. The camera turns on IR LEDs, and its sensor captures reflected IR light to create a black-and-white image. This is effective, but it is not magic. Image quality at night depends on how well the camera handles low light, glare, and motion.

    Common night-vision approaches you will see:

    Infrared (IR) night vision (black-and-white)

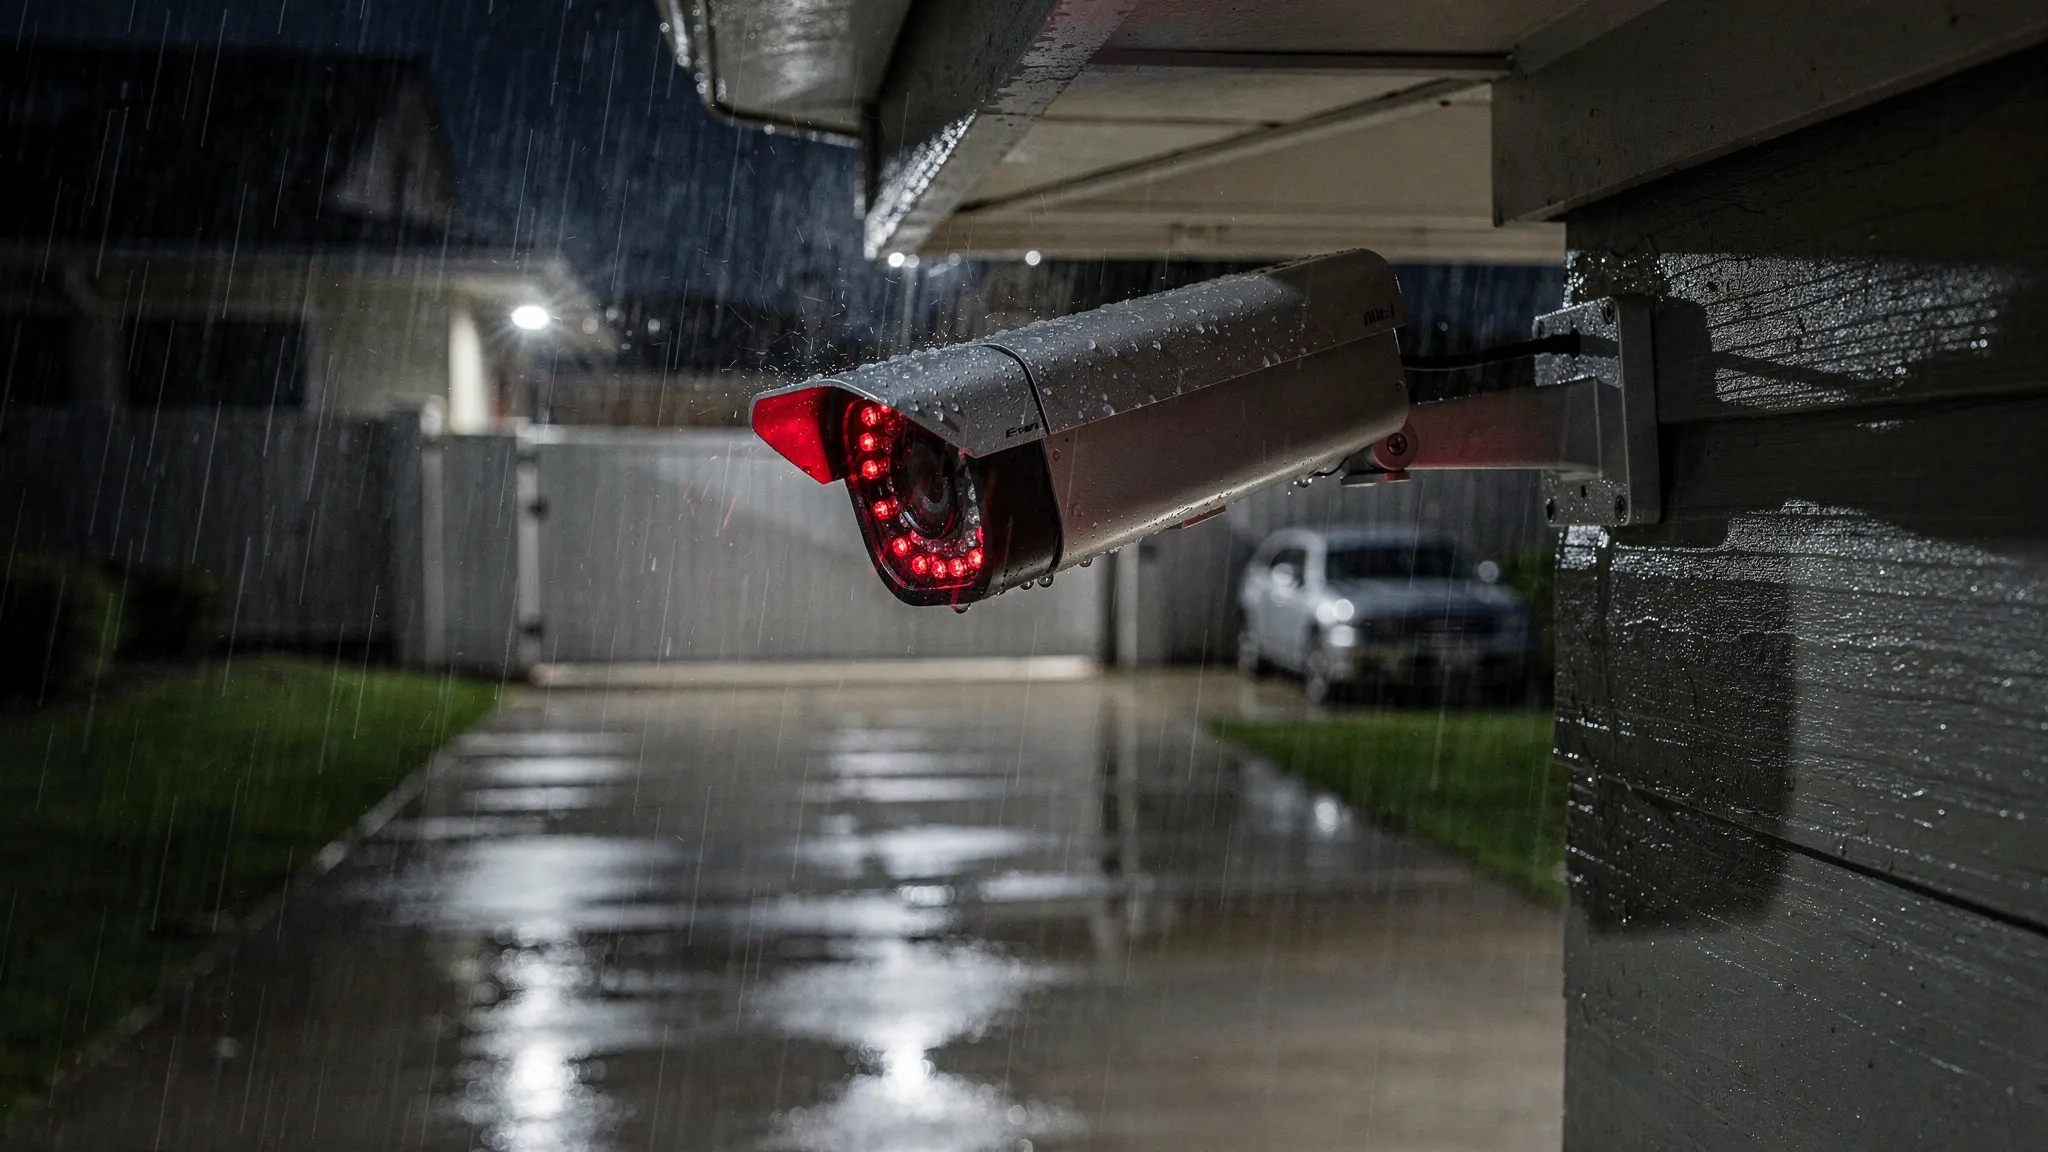
    IR is the most common option for outdoor security. It can deliver reliable visibility even in complete darkness, especially when paired with high-intensity infrared lights.

    What to watch for outdoors:

    • IR reflection and glare from nearby walls, gutters, soffits, or shiny surfaces can wash out the image.
    • Rain, fog, and snow can reflect IR light back into the lens, reducing clarity.
    • Insects attracted to IR can trigger motion events and block the view.

    Low-light colour (“starlight”) and spotlight-assisted colour

    Some cameras aim to keep colour at night using sensitive sensors, wider apertures, or built-in spotlights. Colour can be helpful for identifying clothing, vehicles, or packages, but it depends heavily on ambient lighting.

    A practical rule: if your outdoor area is truly dark, IR remains the most consistent option.

    Thermal imaging (specialist use)

    Thermal is excellent for detection, but it is typically expensive and less useful for facial or fine-detail identification. For most home setups, it is beyond what you need.

    The core checklist for an outdoor security camera system with night vision

    Instead of focusing on one headline spec, evaluate your camera system as a chain: capture, detect, record, access, and secure.

    1) Night image quality: sensor, IR strength, and motion handling

    At night, motion blur is the number one reason footage becomes unusable. A camera can show a bright scene but still fail to identify a person moving quickly.

    Look for:

    • Strong IR illumination suitable for your garden/driveway depth, not just a short porch.
    • Good low-light performance (often described as low-lux performance, even if manufacturers vary in how they report it).
    • Balanced exposure so faces are not blown out when someone is close to the camera.

    Tip: if possible, test a camera by walking the path you care about (gate to door, driveway to garage) at night. The goal is to confirm recognisable faces or readable plates at the distance that matters to you.

    2) Weatherproofing: IP ratings that match real UK weather

    For outdoor use, an IP rating matters. IP66 is a strong indicator of protection against dust and heavy water jets, which is relevant for wind-driven rain.

    Also consider:

    • Cable entry points and seals (a common failure point)
    • Mount stability in high winds
    • Operating temperature range (important if the camera is exposed)

    3) Detection that reduces false alerts

    Outdoor motion alerts can become noise fast. Trees, shadows, pets, and headlights can trigger constant notifications.

    A major upgrade is AI human detection, which aims to distinguish people from general motion. It does not make a camera perfect, but it can dramatically reduce junk alerts so you actually pay attention when a notification arrives.

    4) Recording and evidence: cloud, local, or both

    A good outdoor system should answer two questions:

    • Will it record when Wi-Fi drops?
    • Will footage still exist if the camera is stolen?

    Many households choose a hybrid approach: local recording for continuity plus cloud recording for off-site backup.

    Here is a simple comparison:

    Recording method What it’s good for Trade-offs to consider
    MicroSD (local) Works even if internet is down, fast access, no ongoing fees If the camera is stolen or damaged, the card can be lost too
    Cloud Off-site backup, easier sharing, safer if camera is stolen Depends on internet, may involve a subscription, check retention policies
    Local + cloud Best coverage for reliability and incident recovery More setup, potential ongoing cost

    If you choose MicroSD, buy a reputable card designed for continuous recording (often marketed as “high endurance”).

    5) Remote access and day-to-day usability

    A camera is only helpful if you can review clips quickly and confidently. Look for:

    • 24/7 remote access via a mobile app
    • Clear timeline playback and event filtering
    • Strong account security options (use unique passwords and enable any available two-step verification)

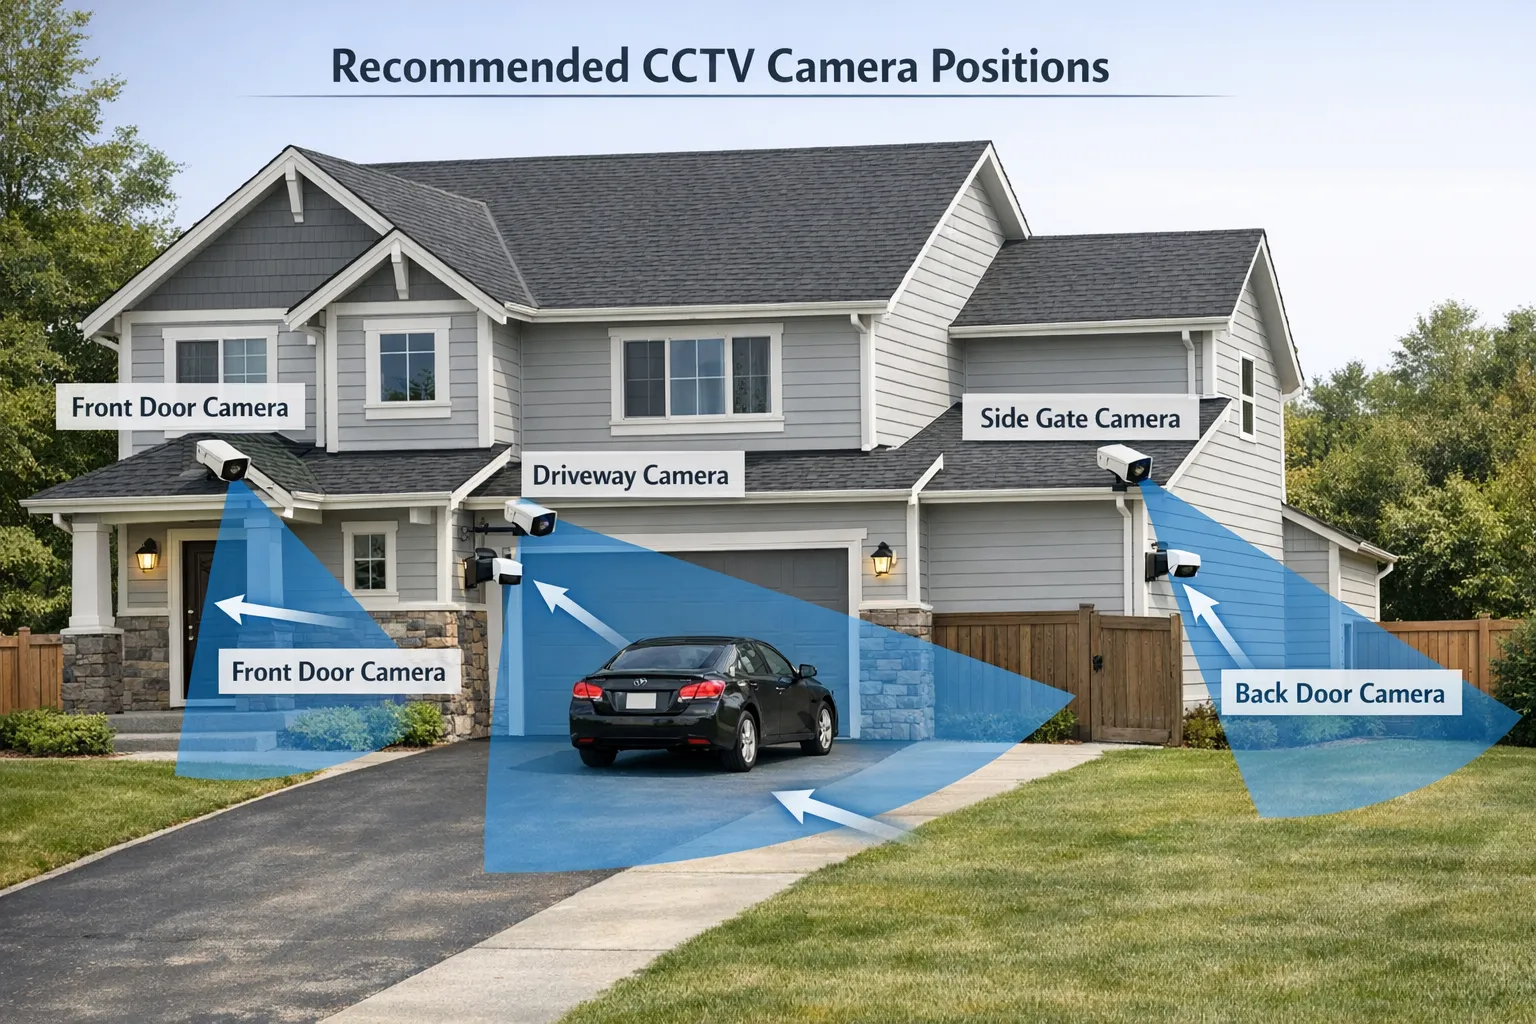
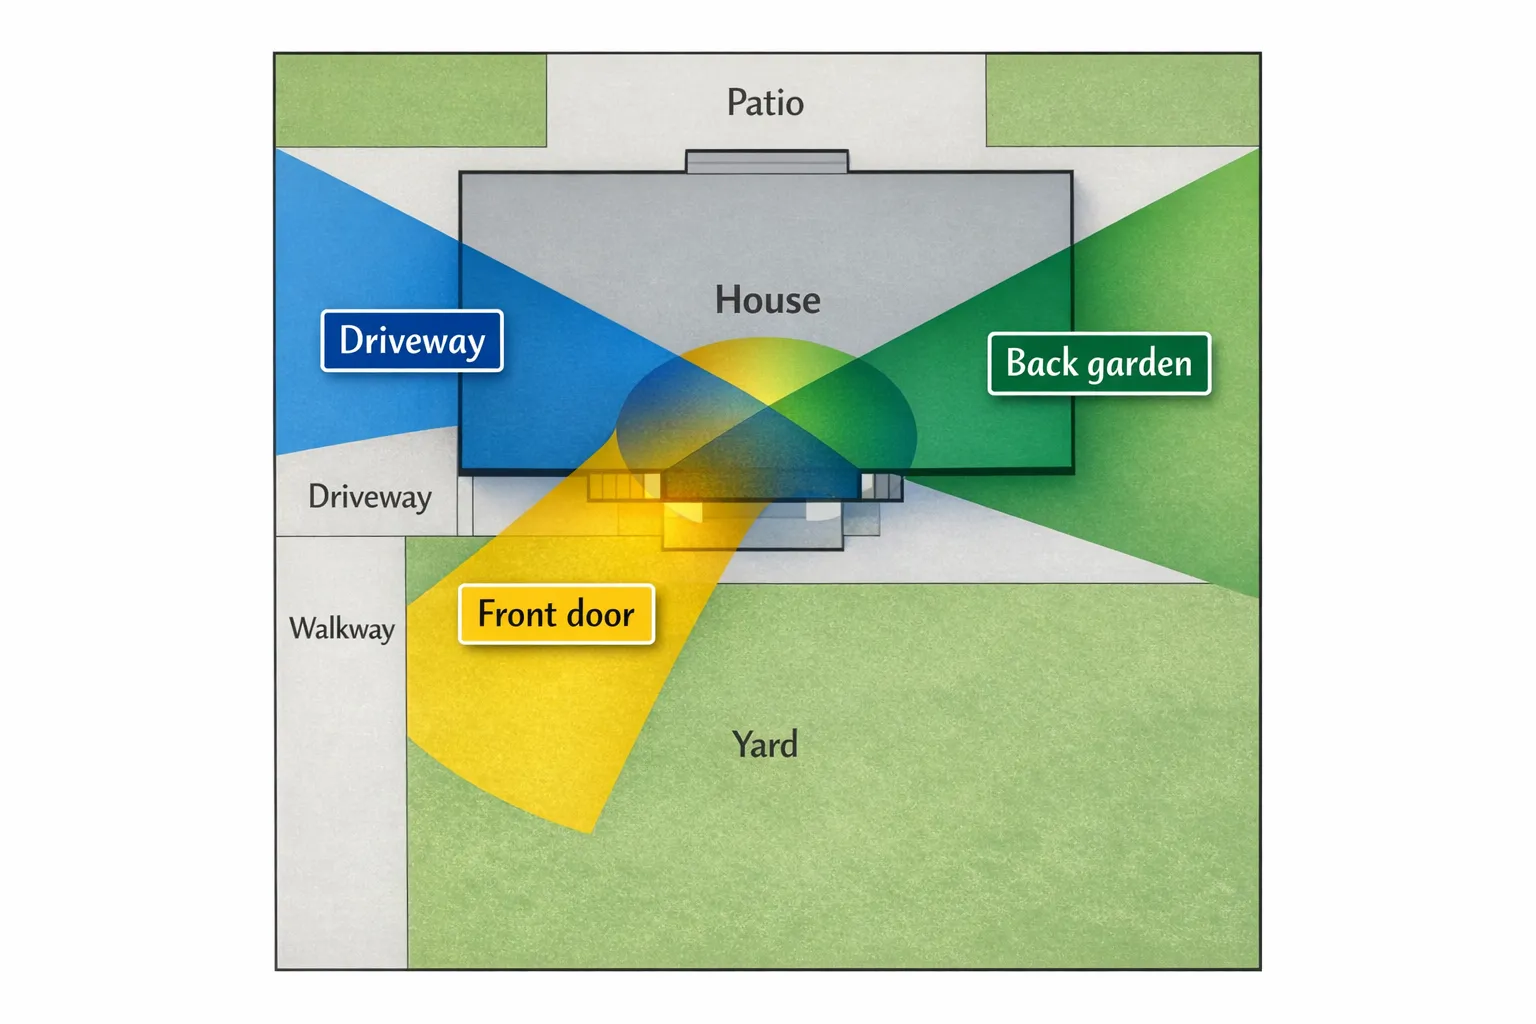
    Coverage matters more than resolution: field of view, placement, and zoom

    Many buyers overestimate what resolution alone can do. A wide-angle camera can capture a whole driveway, but a person’s face may still be too small at the far end.

    Better outcomes usually come from designing coverage intentionally:

    • Use overlap: one view for approach (wide) and one for identification (closer).
    • Mount at the right height: too high reduces facial detail, too low increases tampering risk.
    • Avoid aiming directly at lights: porch lights and car headlights can destroy night detail.

    Why pan/tilt/zoom helps outdoors

    Pan/tilt/zoom is useful when:

    • You want one device to cover multiple angles (driveway plus gate)
    • You need to check a wider area on demand
    • You want to zoom in for detail after receiving an alert

    Just remember: a camera cannot watch everywhere at once if it is physically pointed in one direction at a time. For high-risk areas, fixed coverage or multi-camera setups can be more reliable.

    Dual-lens outdoor cameras: when they make sense

    A dual-lens design can help when you want both broad context and closer detail from the same mounting position. For example, one lens can maintain situational awareness while the other focuses tighter.

    This approach can be especially useful at night, where identification is harder and you benefit from having both context (what happened) and detail (who it was).

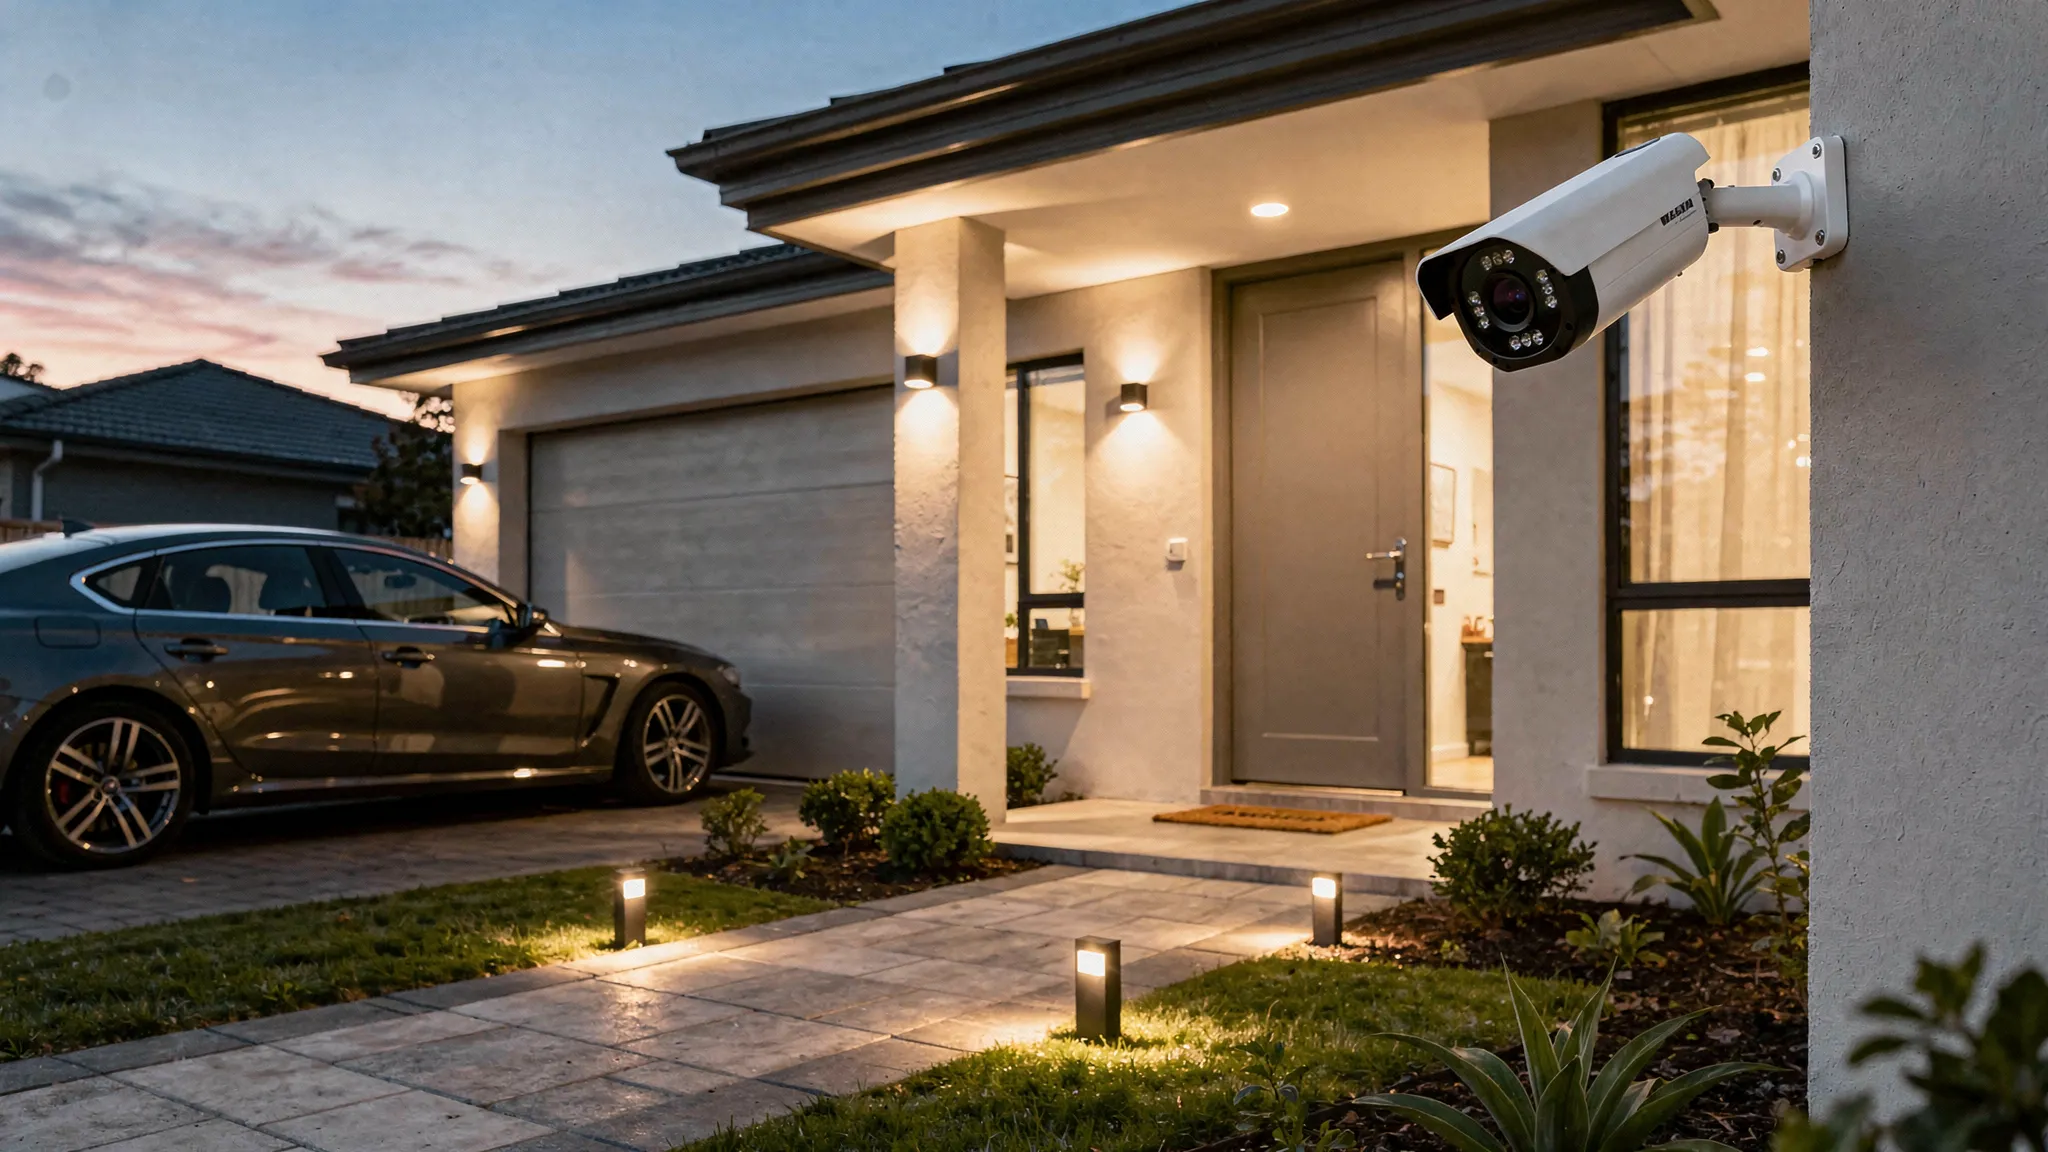
    Example: what to look for in a camera like Nakavision C1

    If you are evaluating a camera in the “outdoor-ready, night-vision-focused” category, it can be helpful to map features to real problems you are trying to solve.

    Nakavision describes the Nakavision C1 as a dual-lens home security camera designed for indoor and outdoor use, with:

    • Dual-lens HD monitoring
    • AI human detection
    • 24/7 remote access
    • Pan/Tilt/4x Zoom
    • High-intensity infrared lights
    • Weatherproofing (IP66)
    • Cloud and local recording
    • MicroSD card support
    • Two-way audio intercom
    • Mobile app integration

    Translated into practical benefits outdoors:

    • High-intensity infrared lights can improve visibility in unlit spaces, such as side passages and back gardens.
    • AI human detection can reduce false alerts from trees, rain, and general motion.
    • IP66 weatherproofing is important for exposed mounting points.
    • Cloud plus local recording can help you keep footage available even if connectivity drops or a device is tampered with.

    If you are comparing options, use those features as a checklist and then validate the fundamentals: placement, lighting, and recording reliability.

    An outdoor home security camera mounted under a house eave at night during light rain, with subtle infrared illumination visible in the scene and a driveway gate in the background.

    A buying guide table you can actually use

    Use this as a quick filter when comparing an outdoor security camera system with night vision.

    Feature Why it matters outdoors What “good” looks like
    Night vision (IR) Enables visibility in complete darkness Strong IR with clear subject detail, not just a bright image
    Weatherproof rating Rain and dust exposure are constant IP66 or better for exposed placements
    AI human detection Reduces notification fatigue Person alerts that are consistent and configurable
    Recording options Preserves evidence Local MicroSD support, cloud option if you want off-site backup
    Remote access You will check events on your phone Stable app, quick playback, simple sharing
    Pan/tilt/zoom Helps scan larger areas Smooth control, usable zoom for detail checks
    Two-way audio Useful for deliveries and deterrence Clear enough audio to communicate at the door or gate
    Installation flexibility Homes vary Indoor/outdoor support, secure mounting, sensible cable management

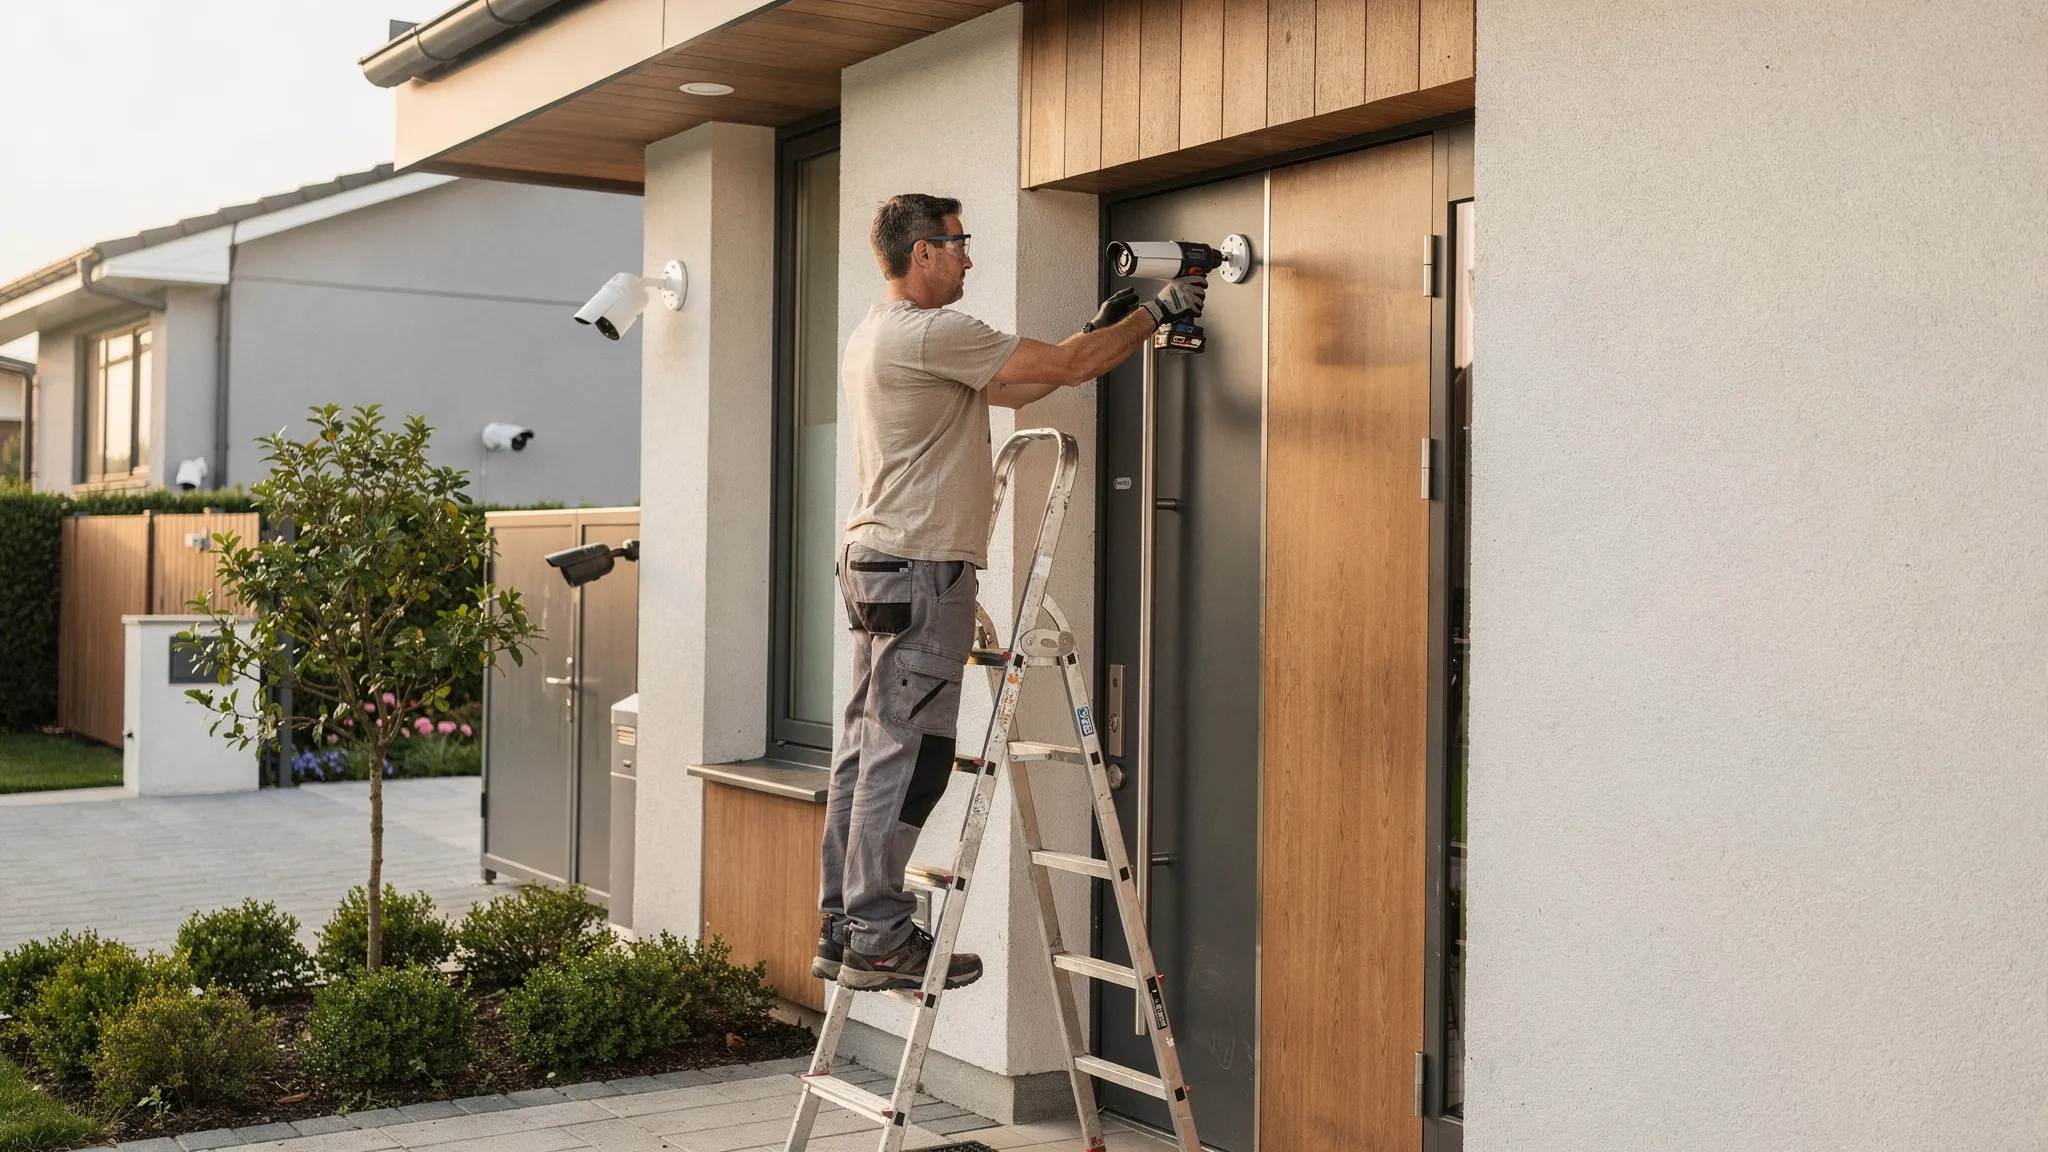
    Installation and setup tips that improve night footage immediately

    You can buy a great camera and still get poor night results if installation is rushed. These steps make a visible difference:

    Position the camera to control glare

    Avoid mounting where IR light will bounce off a nearby wall that fills half the frame. Even a small change in angle can reduce washout.

    Test for real distances, not just “it looks bright”

    At night, walk the exact routes you care about (driveway, path, gate, shed). Confirm whether you can identify a person at the farthest relevant point.

    Manage motion zones

    If your app supports activity zones, exclude swaying trees and roads. This reduces false alerts and keeps recordings focused.

    Plan storage around incidents, not convenience

    For higher-risk areas (front door, driveway), consider cloud backup in addition to local recording so footage survives theft or damage.

    Secure the account and the Wi-Fi

    A security camera is part of your security perimeter. Use a unique password and keep your router firmware up to date. If your camera supports it, enable additional sign-in security.

    Privacy and legality in the UK (quick, practical overview)

    In the UK, domestic CCTV use is generally allowed, but responsibilities increase if your cameras capture areas beyond your property boundary (for example, the street or neighbours’ gardens).

    The UK Information Commissioner’s Office provides practical guidance for home CCTV users, including being considerate with positioning, limiting coverage where possible, and handling footage appropriately. See the ICO’s guidance on domestic CCTV systems.

    If in doubt, angle cameras to focus on entry points you own and use privacy masking features if your device/app supports them.

    A simple diagram of a house footprint with three highlighted camera coverage cones labelled “Front door”, “Driveway”, and “Back garden”, showing overlapping coverage at entry points.

    Frequently Asked Questions

    Do outdoor night vision cameras work in complete darkness? Yes, if they use infrared (IR) illumination. Performance still varies based on IR strength, scene reflections (walls, rain), and how well the camera handles motion.

    Is colour night vision better than infrared? Not always. Colour night vision can be helpful when there is enough ambient light or a spotlight, but IR is often more reliable in truly dark outdoor areas.

    What IP rating should I look for in an outdoor security camera? For exposed outdoor installation, IP66 is a strong baseline. It indicates protection against dust and powerful water jets, which suits typical wind-driven rain.

    Should I choose cloud recording or MicroSD recording? MicroSD is great for recording continuity and avoiding subscriptions. Cloud is valuable for off-site backup if the camera is stolen or damaged. Many people prefer using both.

    How do I reduce false alerts outside? Use AI human detection if available, set motion zones to exclude roads and trees, and avoid aiming at moving foliage or reflective surfaces.

    Where should I mount an outdoor camera for the best night footage? Aim for a view that captures faces at your key choke points (gate, path, door) without pointing directly at lights. Test at night by walking the route and reviewing the clip.

    Choosing a night-vision outdoor camera that you will actually trust

    If your goal is reliable night coverage with fewer false alerts, prioritise night performance, weatherproofing, smart detection, and a recording setup that protects your evidence.

    If you want a single camera designed to cover more area with strong night capability, you can explore the Nakavision C1, a dual-lens camera with AI human detection, high-intensity infrared lights, IP66 weatherproofing, pan/tilt/4x zoom, two-way audio, and cloud plus local recording support. Learn more at Nakavision.

  • How to Choose a Security Camera for Home

    How to Choose a Security Camera for Home

    Most people start shopping for a security camera for home after a near miss: a parcel goes missing, a neighbour reports suspicious activity, or you simply want more peace of mind when you are away. The tricky part is that “security camera” can mean anything from a basic indoor webcam to a weatherproof, AI-enabled system with night vision and remote access.

    This guide walks you through the practical decisions that matter, so you can choose a camera that actually fits your property, your routines, and your privacy expectations.

    1) Start with the use case (this prevents expensive mistakes)

    Before comparing specs, get clear on what you need the camera to do. A camera that is perfect for a front door may be wrong for a back garden, a driveway, or an indoor hallway.

    Ask yourself:

    • Where is the risk? Front door, side passage, back gate, garage, shared access path, inside entryway.
    • What do you need to identify? Motion only, clear faces, number plates, or general activity.
    • When does it matter most? Night time, working hours, weekends away.
    • Who will use it? Just you, or multiple household members who need app access.

    If your goal is identification (not just “something moved”), prioritise image quality, positioning, and night performance over clever add-ons.

    2) Indoor vs outdoor cameras: the requirements are different

    Outdoor cameras have to deal with rain, wind, glare, low winter light, and big temperature swings. Indoor cameras are more about discreet placement, two-way audio, and privacy.

    Location What matters most What to look for
    Front door / porch Faces, parcels, night performance Strong night vision, wide enough view, reliable motion detection
    Driveway Vehicles, wider area coverage Wider view, good low-light performance, optionally pan/tilt to follow movement
    Back garden Long range at night, weather resistance Weatherproof rating (for example IP66), infrared night vision, stable Wi‑Fi range
    Hallway / entryway Awareness and two-way talk Two-way audio, privacy controls, easy app access

    If you only buy one camera, most households get the best value by covering the main entry point first.

    3) Image quality: resolution is not the whole story

    A common mistake is buying based on “HD” or “2K” alone. Resolution helps, but real-world clarity depends on several factors.

    Resolution (HD and beyond)

    Look for at least HD for general monitoring. If you want better identification at distance, higher resolution helps, but only if the lens and night performance keep up.

    Field of view (how much you can see)

    A very wide view can capture more area, but faces may become smaller and harder to identify. A narrower view can be better for a doorway where you want detail.

    Zoom and camera movement

    If you need flexibility, features like pan/tilt and zoom let you adjust coverage without relocating the camera. This can be especially useful for driveways, patios, and open-plan areas.

    For example, a camera such as the Nakavision C1 includes pan/tilt and 4x zoom, which can help when you want one camera to cover multiple angles.

    4) Night vision: check how it performs, not just whether it has it

    Night vision is often where cheaper cameras disappoint. For UK winters and low-light conditions, prioritise:

    • Infrared night vision that produces a clear image without heavy blur
    • Strong infrared illumination for longer reach (useful for gardens and driveways)
    • Smart detection to reduce constant “false alarms” triggered by shadows or headlights

    Nakavision C1, for instance, specifies high-intensity infrared lights, which is a meaningful feature when your key events happen after dark.

    A home exterior at night with a security camera mounted under the eaves, showing an infrared-lit view of a front door and driveway area, with clear visibility of the entrance and path.

    5) Detection and alerts: AI features are only valuable if they reduce noise

    Many buyers want instant alerts, but alerts only help if they are accurate.

    Motion detection vs human detection

    Basic motion detection can be triggered by rain, trees, pets, shadows, and passing traffic. Cameras with AI human detection are typically better at filtering events so you get fewer nuisance notifications.

    If you have a busy street, a shared walkway, or frequent deliveries, human detection becomes a high-impact upgrade.

    Tracking moving people

    Some cameras can track movement across the scene. If you want to understand where someone went (gate to door, driveway to side passage), AI-powered tracking can provide a clearer story than a fixed view.

    6) Storage: cloud, local, or both

    Storage is a major decision because it affects cost, reliability, and how quickly you can retrieve footage.

    Cloud recording

    Cloud storage is convenient, especially if a camera is stolen or damaged. The trade-off is you may have an ongoing subscription, depending on the provider.

    Local recording (MicroSD)

    Local storage can avoid monthly fees and can be fast to review, but footage may be lost if the camera is taken or the card is damaged.

    Best practice: choose a camera that supports both

    A flexible setup gives you options. The Nakavision C1 supports cloud and local recording and MicroSD card support, which is useful if you want redundancy or want to start locally and add cloud later.

    Storage type Pros Cons Best for
    Cloud Off-site backup, easy access Possible subscription, depends on internet High security needs, theft risk
    Local (MicroSD) No recurring fee, quick playback Risk if camera is stolen, card limits Budget-focused, indoor cameras
    Cloud + local Redundancy and flexibility Can be more setup Most households who want reliability

    7) Connectivity and remote access: reliability matters more than features

    Most modern cameras rely on Wi‑Fi and a mobile app for live view and playback. When comparing options, think about your home’s layout.

    • Camera location vs router distance: external walls and brick can reduce signal.
    • App experience: you want fast loading, straightforward playback, and stable notifications.
    • 24/7 access: check that the camera is designed for always-on monitoring, not only event clips.

    If remote monitoring is core to your needs, choosing a camera designed for 24/7 remote access (like Nakavision C1) matters.

    8) Audio: two-way talk can be a real safety feature

    Two-way audio is often marketed as a convenience feature, but it can also be protective.

    • Speak to delivery drivers without opening the door.
    • Warn off trespassers if you get an alert.
    • Check in on family members if the camera is used indoors.

    Nakavision C1 includes two-way audio intercom, which aligns well with front-door, hallway, or driveway coverage.

    9) Outdoor durability: understand IP ratings and placement

    For outdoor use, look for a clearly stated weatherproof rating (IP ratings). A camera rated IP66 is designed to cope with rain and dust in typical outdoor installations.

    Placement tips that help performance and longevity:

    • Mount under eaves if possible to reduce direct rain on the lens.
    • Avoid pointing directly at bright lights to reduce glare.
    • Angle slightly downward to capture faces rather than only the tops of heads.

    Nakavision C1 is listed as IP66 weatherproof, which makes it suitable for many outdoor setups.

    10) Privacy and security: do not skip this part

    A home camera is a security device, but it also collects sensitive data. Two practical steps:

    Follow UK privacy expectations

    If your camera captures beyond your property boundary (for example a public pavement or a neighbour’s garden), you should understand your responsibilities. The UK Information Commissioner’s Office provides guidance for domestic CCTV users.

    Secure the account and device

    Good security hygiene makes a big difference:

    • Use a unique, strong password for the camera app account.
    • Enable multi-factor authentication if available.
    • Keep firmware updated when updates are offered.
    • Review who has access to the camera in the app.

    11) A simple buying checklist (match the camera to your goal)

    Use this as a quick filter when comparing models.

    Your goal Prioritise Nice to have
    See who is at the door Clear image, night vision, reliable alerts Two-way audio
    Monitor a driveway Wider coverage, night performance Pan/tilt, zoom, tracking
    Reduce false alerts AI human detection Activity zones (if offered)
    Avoid subscriptions MicroSD local recording Cloud as optional backup
    Outdoor all-year use Weatherproof rating (for example IP66) Mounting options

    12) Where Nakavision C1 fits (example of a balanced spec set)

    If you are looking for a single camera that covers common “must-haves” for a security camera for home, Nakavision C1 is positioned around several practical decision points covered above:

    • Dual-lens HD monitoring for high-quality imaging
    • AI human detection and AI-powered tracking to improve alert quality
    • Night vision with high-intensity infrared lights
    • Pan/tilt and 4x zoom for flexible coverage
    • IP66 weatherproof for outdoor use
    • Cloud and local recording plus MicroSD card support
    • Two-way audio intercom and mobile app integration for remote access

    The key is to match these capabilities to your layout and priorities, especially camera placement and night coverage.

    Frequently Asked Questions

    What is the best security camera for home use in the UK? The best choice depends on where you are monitoring (front door, driveway, garden, indoors) and whether you need identification-quality footage, night vision, and reliable alerts. In the UK, weatherproofing for outdoor cameras and strong night performance are often high priorities.

    Is cloud recording necessary for home security cameras? Cloud recording is not strictly necessary, but it can be valuable because footage is stored off-site. Many people choose a camera that supports both cloud and local (MicroSD) recording so they can balance cost and resilience.

    Do I need AI human detection? If you want fewer false alerts from rain, shadows, pets, or traffic, AI human detection can be a meaningful upgrade. It is especially useful for front doors, driveways, and street-facing cameras.

    Where should I place a security camera for the best results? Place cameras high enough to prevent easy tampering but angled to capture faces. Avoid aiming directly into bright lights. For outdoor cameras, mounting under eaves can improve lens clarity and reduce weather exposure.

    Can I install an outdoor security camera myself? Many home cameras are designed for straightforward installation, but you should still plan for a reliable power source (if required), stable Wi‑Fi coverage, and safe mounting. If you are unsure about drilling, ladders, or cable routing, consider professional help.


    Ready to choose a home security camera that fits your setup?

    If you want a camera built for 24/7 monitoring with AI human detection, night vision, remote app access, and flexible recording options, you can learn more about the Nakavision C1 on the official site: Nakavision.

  • CCTV Camera Installation: Step-by-Step Guide

    CCTV Camera Installation: Step-by-Step Guide

    CCTV camera installation is one of the most effective ways to protect a home, deter opportunistic crime, and give you reliable evidence if something does happen. The difference between a camera that “sort of works” and a system you can trust usually comes down to the installation details: placement, power, network stability, recording settings, and privacy compliance.

    This step-by-step guide walks you through a practical, DIY-friendly CCTV camera installation process for typical home setups (and small premises). It also highlights common mistakes so you can avoid blind spots, false alerts, and missed recordings.

    Before you start: plan coverage, power, and privacy

    A good install begins on paper. Spend 15 minutes planning and you can save hours later.

    Define what you need the cameras to do

    Ask yourself:

    • Are you mainly deterring (visible camera with signage) or identifying (clear face detail at entry points)?
    • Do you need live viewing, motion alerts, or continuous 24/7 recording?
    • Are you covering indoor areas, outdoor entrances, or both?

    A common approach is to prioritise entry points first (front door, back door, side gate) and then cover the driveway or garden.

    Check UK privacy expectations (especially outdoors)

    In the UK, domestic CCTV is usually fine, but if your camera captures areas beyond your property boundary (pavement, neighbour’s garden, shared driveway), you may have data protection responsibilities.

    The UK Information Commissioner’s Office (ICO) provides practical guidance for home CCTV, including minimising capture, positioning, and being transparent where appropriate: ICO guidance on domestic CCTV.

    Practical privacy tips:

    • Angle cameras to focus on your entrances and your land.
    • Use privacy masking in the app if available.
    • Avoid pointing directly into neighbours’ windows.
    • Keep recordings secure and don’t share clips casually.

    Step 1: choose the right camera type for your installation

    Your camera choice affects how difficult the install will be.

    Wi-Fi vs wired (including PoE)

    Wi-Fi cameras are typically easier to install because you avoid running data cables, but you still need reliable power and a stable Wi-Fi signal. Wired cameras can be more work upfront but are often more consistent for continuous recording.

    Option Best for Pros Trade-offs
    Wi-Fi + mains power DIY installs, indoor use, quick upgrades Faster install, flexible placement Depends on Wi-Fi strength, still needs a nearby socket (or a safe power run)
    Wired Ethernet + PoE (Power over Ethernet) High reliability, longer cable runs One cable for power and data, stable connection Requires running Ethernet cable and PoE equipment
    Wired power + local recording Properties with easy cable routes Reliable power, can pair with local storage More drilling and routing, depends on device ecosystem

    Features that reduce installation headaches

    Look for features that help you “recover” from imperfect placement:

    • Pan/tilt and zoom to fine-tune coverage after mounting
    • Night vision (infrared) for usable footage in darkness
    • Human detection to reduce false alarms
    • Weatherproofing for outdoor installs (for example, IP66-rated housings)

    If you’re considering a dual-lens model such as Nakavision C1, it can be helpful in areas where you want more coverage without installing multiple cameras, but you should still plan placement carefully to avoid glare and blind spots.

    Step 2: decide on recording (cloud, local, or both)

    Recording is where many DIY installations fall down. You can have perfect camera placement and still miss the critical moment if your storage settings are wrong.

    Common recording approaches:

    • Local recording (for example, microSD on the camera): simple, no monthly plan, but footage may be lost if the camera is stolen or damaged.
    • Cloud recording: footage is stored off-site, but may require a subscription depending on the provider.
    • Cloud + local: best resilience for many homes.

    For cameras that support both (for example, devices offering cloud and local recording plus microSD support), you can use local recording as a baseline and cloud as backup for key areas like the front door.

    Step 3: map camera locations and mounting heights

    Where you install a CCTV camera matters more than the specification on the box.

    Recommended home camera locations

    Area What it’s good for Placement tip
    Front door Face detail, deliveries, visitor disputes Mount high enough to prevent tampering, but not so high that faces become top-down views
    Driveway Vehicle approach, number plate context Avoid pointing directly at headlights to reduce glare at night
    Back door / patio Common entry point, night-time movement Ensure IR night vision isn’t reflecting off nearby walls
    Side gate / alley Hidden access routes Use motion alerts plus continuous recording if it’s a known vulnerability
    Indoors (hallway) Captures movement between rooms Avoid bedrooms and private areas unless you have a clear reason and household consent

    Height and angle basics

    • Mount outdoor cameras out of easy reach to reduce tampering.
    • Avoid extreme downward angles that lose facial detail.
    • Keep the lens away from surfaces that cause reflections at night (glossy soffits, windows, white walls).

    A simple home exterior diagram showing recommended CCTV camera positions at the front door, driveway, side gate, and back door, with arrows indicating viewing angles and shaded coverage zones.

    Step 4: check Wi-Fi strength (if using Wi-Fi cameras)

    Before drilling, test the camera where you want it.

    • Use your phone to check Wi-Fi signal at the proposed mounting location.
    • If your router is far away, consider a mesh Wi-Fi node nearer the camera.
    • Expect outdoor walls (especially brick) to reduce signal.

    If the camera supports 24/7 monitoring, a stable connection becomes even more important for smooth live viewing and reliable alert delivery.

    Step 5: gather tools and prep safely

    Most DIY CCTV camera installation jobs need only basic tools.

    Tool / item Why you need it
    Drill + masonry/wood bits Mounting to brick, render, timber, soffits
    Wall plugs and suitable screws Secure fixing for the surface type
    Screwdriver set Brackets and adjustments
    Spirit level Prevent tilted footage and awkward angles
    Pencil / marker Marking holes accurately
    Cable clips or trunking Neater, safer cable routing
    Outdoor-rated sealant (if needed) Sealing cable entry points against water
    Ladder (used safely) Mounting at safe heights

    Safety reminders:

    • If you are unsure about electrics or routing power outdoors, use a qualified installer.
    • Avoid drilling into hidden wiring or pipes (a basic detector can help).

    Step 6: mount the camera and route cables

    Take your time here. A few millimetres can change the view a lot.

    Mark, drill, and mount

    • Hold the bracket in place and mark hole positions.
    • Drill the holes appropriate for your surface.
    • Insert wall plugs if required.
    • Fix the mount firmly so it does not shift in wind or vibration.

    Route power and data cleanly

    Good cable routing is about reliability and appearance.

    • Keep cables tight to surfaces using clips or trunking.
    • Create a drip loop (a small downward loop in the cable) before it enters the camera or wall, so rainwater drips off instead of running into the entry point.
    • Seal any exterior entry holes if necessary.

    If you are mounting outdoors, confirm the camera’s weatherproof rating is suitable for exposure. An IP66-rated camera housing is designed to handle typical outdoor conditions, but you should still avoid obvious water paths and insecure connections.

    Step 7: power on and complete app setup

    Most modern CCTV cameras are managed from a mobile app.

    Typical setup steps:

    • Power the camera on and wait for it to initialise.
    • Add the device in the app and connect it to your Wi-Fi (if applicable).
    • Update firmware if prompted (this is important for security and stability).

    If your device supports two-way audio, test it early. It is easier to fix mic/speaker settings before you finalise the mounting angle.

    Step 8: tune the view (and avoid common night vision problems)

    Now you refine the camera’s angle and detection settings.

    Use real-world testing, not guesswork

    • Walk the path a visitor or intruder would take.
    • Review footage in daylight and after dark.
    • Check whether faces are visible at the distance you care about.

    Fix these common issues

    • Headlight glare: reposition so car headlights do not point directly into the lens.
    • IR reflection: if the camera sees a bright white haze at night, it may be reflecting off a wall, gutter, or window. Adjust the angle or move the camera slightly.
    • Motion spam: narrow detection zones to exclude roads, trees, or busy pavements.

    If your camera includes AI human detection and tracking, enable those features after you confirm the basic view is correct. AI settings cannot compensate for a camera that is aimed at the wrong place.

    Step 9: set recording rules and retention you can rely on

    This is where you ensure evidence actually exists when you need it.

    Choose the right recording mode

    • If you want maximum evidence coverage, use continuous recording where supported.
    • If you prefer to save storage, use motion-triggered recording, but increase pre-record buffering if the system supports it (so you capture the seconds before motion is detected).

    Check storage health

    • If using a microSD card, use a reputable card designed for continuous writing when possible, then format it in the app/device as recommended.
    • If using cloud recording, confirm the camera shows “online” consistently and that uploads are not failing.

    Set alerting with intent

    The goal is not “more notifications”, it is “useful notifications”. For most homes:

    • Enable human-only alerts for outdoor areas.
    • Lower sensitivity during windy nights if trees trigger false motion.
    • Consider scheduling alerts (for example, quieter during school run hours, stricter overnight).

    Step 10: secure your CCTV system (often overlooked)

    A CCTV camera is an internet-connected device, treat it like one.

    • Use a strong, unique password for the camera account.
    • Turn on two-factor authentication if the app offers it.
    • Keep firmware updated.
    • Secure your home Wi-Fi (WPA2/WPA3, strong router password).

    Quick troubleshooting checklist

    If something is not working after installation:

    • No live view: check power first, then Wi-Fi strength, then app permissions.
    • Delayed alerts: check upload speed, signal strength, and notification settings.
    • Poor night footage: reposition to reduce reflections and bright light sources.
    • Missed events: confirm recording mode, storage status, and motion zones.

    Frequently Asked Questions

    How much does CCTV camera installation cost in the UK? DIY installation can be low-cost if you already have tools and nearby power, but costs vary widely depending on camera type, cable runs, and whether you choose cloud recording or professional installation. For complex wiring, outdoor power work, or multi-camera systems, a professional quote is usually worth getting.

    Where is the best place to install a CCTV camera outside a house? Most homes get the best security impact by covering the front door, driveway, and back door first. Position cameras to capture faces at entry points and avoid pointing directly at roads, neighbours’ windows, or strong light sources.

    Is it legal to have CCTV on your house in the UK? Generally yes, but if your cameras capture beyond your property boundary you may have data protection responsibilities. Follow the ICO domestic CCTV guidance and minimise coverage of public areas and neighbours’ property.

    Should I choose cloud or local recording? Local recording (such as microSD) is simple and often cheaper long-term, but footage can be lost if the camera is stolen or damaged. Cloud recording stores footage off-site but may require a subscription. Many people choose both for resilience.

    How high should I mount a CCTV camera? High enough to reduce tampering and still capture usable facial detail. If it’s too high, you may only record the top of someone’s head. A practical approach is to mount above typical reach and then test footage by walking through the area.

    Make your installation easier with the right camera

    If you’re planning a DIY CCTV camera installation, using a camera designed for both indoor and outdoor monitoring can simplify the job and reduce rework. Nakavision’s range includes the Nakavision C1, a dual-lens home security camera with features such as AI human detection, night vision, pan/tilt and zoom, two-way audio, and cloud and local recording options.

    Explore the camera and specifications at Nakavision and choose a setup that matches your property layout and recording needs.

  • 2026 Top 5 Security Cameras + Expert Pro Tips

    best security cameras 2026

    TOP1
    Nakavision C1 – Best Overall Security Camera

    The clear top choice for 2026 is the Nakavision C1. Equipped with a pair of advanced lenses and SmartSens imaging technology, it delivers superior performance in all lighting conditions.

    Why it’s #1

    -Uses the SmartSens SC3335AI sensor, optimized for night vision and low-light performance with very low noise and high sensitivity.
    -SmartSens technology includes proprietary features like SFCPixel®, which increases sensitivity by reducing distance between key components, and PixGain™, which balances gain for better detail both day and night.
    -Includes Lightbox IR® tech for doubled infrared efficiency in the 850–940 nm range, improving dark environment imaging.
    -Dual-lens pan-tilt design with AI human detection, 4× zoom, dual HD streams, and cloud/NVR recording make it versatile for home or small business use.

    EXPERT INFO:
    SmartSens Sensor Background
    SmartSens is a major global CMOS image sensor supplier with hundreds of patents and a strong product portfolio focused on high-performance imaging for security as well as automotive and machine vision. The company holds hundreds of granted patents worldwide and has been a top vendor in security CIS market share.
    Their patented pixel and readout designs enhance dynamic range, reduce noise, and improve low-light response — key metrics for a security camera sensor.

    TOP2
    Xiaomi Outdoor Dual CW500

    Best Budget Outdoor Camera
    Great value for basic outdoor monitoring with solid video quality and dual-lens wide view. Performs reasonably in normal conditions but lacks the advanced low-light sensor capabilities seen in premium models.

    -Affordable and easy to set up
    -Good for day-time monitoring
    -Night performance and AI features are limited compared to top-tier sensors

    TOP3
    TP-Link Tapo C501GW 4G LTE

    -Best LTE Outdoor Camera
    Excellent choice if you need a cellular backup or have unreliable Wi-Fi. Stable performance outdoors with decent imaging, but sensor and night vision quality remain mid-tier.

    -4G LTE connectivity
    -Weatherproof design
    -Basic motion alerts and cloud storage

    TOP4
    TP-Link Tapo C100

    Best Budget Indoor Camera
    Simple and dependable option for indoor use. Good overall performance for the price, but imaging quality and low-light performance lag behind cameras with more advanced sensors.

    -Easy installation
    -Basic detection features
    -Good for general home monitoring

    TOP5
    TP‑LINK Tapo C200

    Versatile Indoor Pan-Tilt Camera
    A step up from fixed cameras with pan-tilt control and reliable motion tracking. Better coverage than basic models, but still uses a standard consumer sensor without the specialized imaging tech found in premium devices.

    -Flexible viewing angle
    -Motion tracking
    -Good app support

    EXPERT Summary

    For 2026, the Nakavision C1 stands out due to its cutting-edge imaging sensor and night vision performance, thanks to SmartSens technology that rivals larger sensor manufacturers. Mid-range and budget options from Xiaomi and TP-Link/Tapo provide solid alternatives where advanced low-light imaging isn’t a priority.