CCTV camera installation is one of the most effective ways to protect a home, deter opportunistic crime, and give you reliable evidence if something does happen. The difference between a camera that “sort of works” and a system you can trust usually comes down to the installation details: placement, power, network stability, recording settings, and privacy compliance.
This step-by-step guide walks you through a practical, DIY-friendly CCTV camera installation process for typical home setups (and small premises). It also highlights common mistakes so you can avoid blind spots, false alerts, and missed recordings.
Before you start: plan coverage, power, and privacy
A good install begins on paper. Spend 15 minutes planning and you can save hours later.
Define what you need the cameras to do
Ask yourself:
- Are you mainly deterring (visible camera with signage) or identifying (clear face detail at entry points)?
- Do you need live viewing, motion alerts, or continuous 24/7 recording?
- Are you covering indoor areas, outdoor entrances, or both?
A common approach is to prioritise entry points first (front door, back door, side gate) and then cover the driveway or garden.
Check UK privacy expectations (especially outdoors)
In the UK, domestic CCTV is usually fine, but if your camera captures areas beyond your property boundary (pavement, neighbour’s garden, shared driveway), you may have data protection responsibilities.
The UK Information Commissioner’s Office (ICO) provides practical guidance for home CCTV, including minimising capture, positioning, and being transparent where appropriate: ICO guidance on domestic CCTV.
Practical privacy tips:
- Angle cameras to focus on your entrances and your land.
- Use privacy masking in the app if available.
- Avoid pointing directly into neighbours’ windows.
- Keep recordings secure and don’t share clips casually.
Step 1: choose the right camera type for your installation
Your camera choice affects how difficult the install will be.
Wi-Fi vs wired (including PoE)
Wi-Fi cameras are typically easier to install because you avoid running data cables, but you still need reliable power and a stable Wi-Fi signal. Wired cameras can be more work upfront but are often more consistent for continuous recording.
| Option | Best for | Pros | Trade-offs |
|---|---|---|---|
| Wi-Fi + mains power | DIY installs, indoor use, quick upgrades | Faster install, flexible placement | Depends on Wi-Fi strength, still needs a nearby socket (or a safe power run) |
| Wired Ethernet + PoE (Power over Ethernet) | High reliability, longer cable runs | One cable for power and data, stable connection | Requires running Ethernet cable and PoE equipment |
| Wired power + local recording | Properties with easy cable routes | Reliable power, can pair with local storage | More drilling and routing, depends on device ecosystem |
Features that reduce installation headaches
Look for features that help you “recover” from imperfect placement:
- Pan/tilt and zoom to fine-tune coverage after mounting
- Night vision (infrared) for usable footage in darkness
- Human detection to reduce false alarms
- Weatherproofing for outdoor installs (for example, IP66-rated housings)
If you’re considering a dual-lens model such as Nakavision C1, it can be helpful in areas where you want more coverage without installing multiple cameras, but you should still plan placement carefully to avoid glare and blind spots.
Step 2: decide on recording (cloud, local, or both)
Recording is where many DIY installations fall down. You can have perfect camera placement and still miss the critical moment if your storage settings are wrong.
Common recording approaches:
- Local recording (for example, microSD on the camera): simple, no monthly plan, but footage may be lost if the camera is stolen or damaged.
- Cloud recording: footage is stored off-site, but may require a subscription depending on the provider.
- Cloud + local: best resilience for many homes.
For cameras that support both (for example, devices offering cloud and local recording plus microSD support), you can use local recording as a baseline and cloud as backup for key areas like the front door.
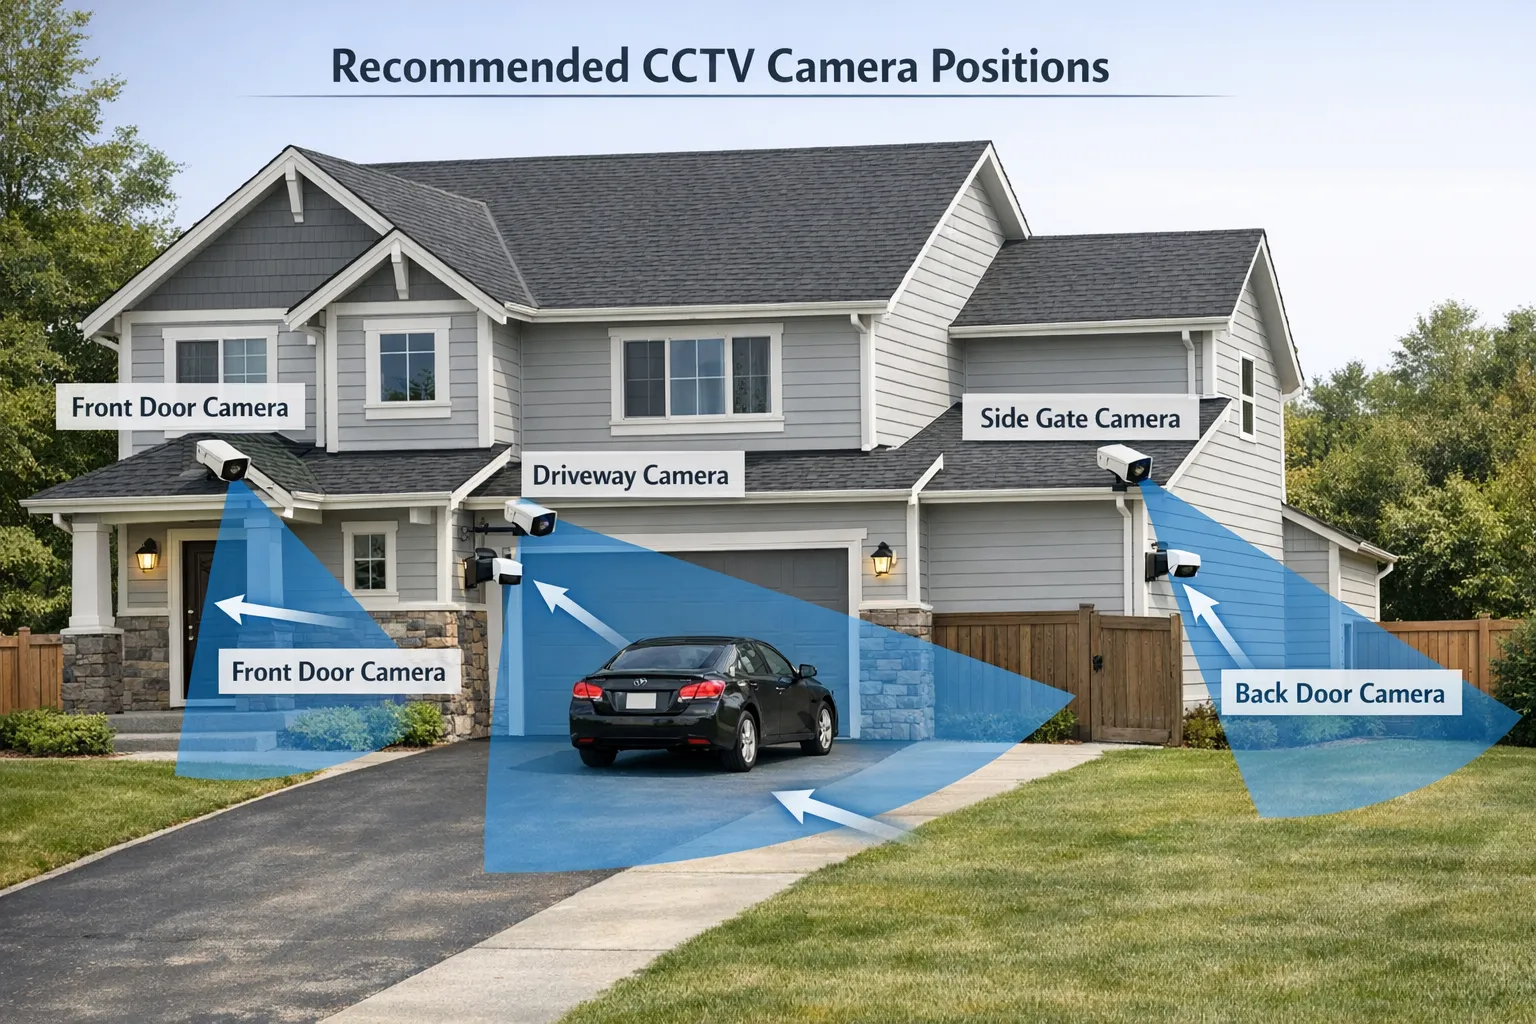
Step 3: map camera locations and mounting heights
Where you install a CCTV camera matters more than the specification on the box.
Recommended home camera locations
| Area | What it’s good for | Placement tip |
|---|---|---|
| Front door | Face detail, deliveries, visitor disputes | Mount high enough to prevent tampering, but not so high that faces become top-down views |
| Driveway | Vehicle approach, number plate context | Avoid pointing directly at headlights to reduce glare at night |
| Back door / patio | Common entry point, night-time movement | Ensure IR night vision isn’t reflecting off nearby walls |
| Side gate / alley | Hidden access routes | Use motion alerts plus continuous recording if it’s a known vulnerability |
| Indoors (hallway) | Captures movement between rooms | Avoid bedrooms and private areas unless you have a clear reason and household consent |
Height and angle basics
- Mount outdoor cameras out of easy reach to reduce tampering.
- Avoid extreme downward angles that lose facial detail.
- Keep the lens away from surfaces that cause reflections at night (glossy soffits, windows, white walls).
Step 4: check Wi-Fi strength (if using Wi-Fi cameras)
Before drilling, test the camera where you want it.
- Use your phone to check Wi-Fi signal at the proposed mounting location.
- If your router is far away, consider a mesh Wi-Fi node nearer the camera.
- Expect outdoor walls (especially brick) to reduce signal.
If the camera supports 24/7 monitoring, a stable connection becomes even more important for smooth live viewing and reliable alert delivery.
Step 5: gather tools and prep safely
Most DIY CCTV camera installation jobs need only basic tools.
| Tool / item | Why you need it |
|---|---|
| Drill + masonry/wood bits | Mounting to brick, render, timber, soffits |
| Wall plugs and suitable screws | Secure fixing for the surface type |
| Screwdriver set | Brackets and adjustments |
| Spirit level | Prevent tilted footage and awkward angles |
| Pencil / marker | Marking holes accurately |
| Cable clips or trunking | Neater, safer cable routing |
| Outdoor-rated sealant (if needed) | Sealing cable entry points against water |
| Ladder (used safely) | Mounting at safe heights |
Safety reminders:
- If you are unsure about electrics or routing power outdoors, use a qualified installer.
- Avoid drilling into hidden wiring or pipes (a basic detector can help).
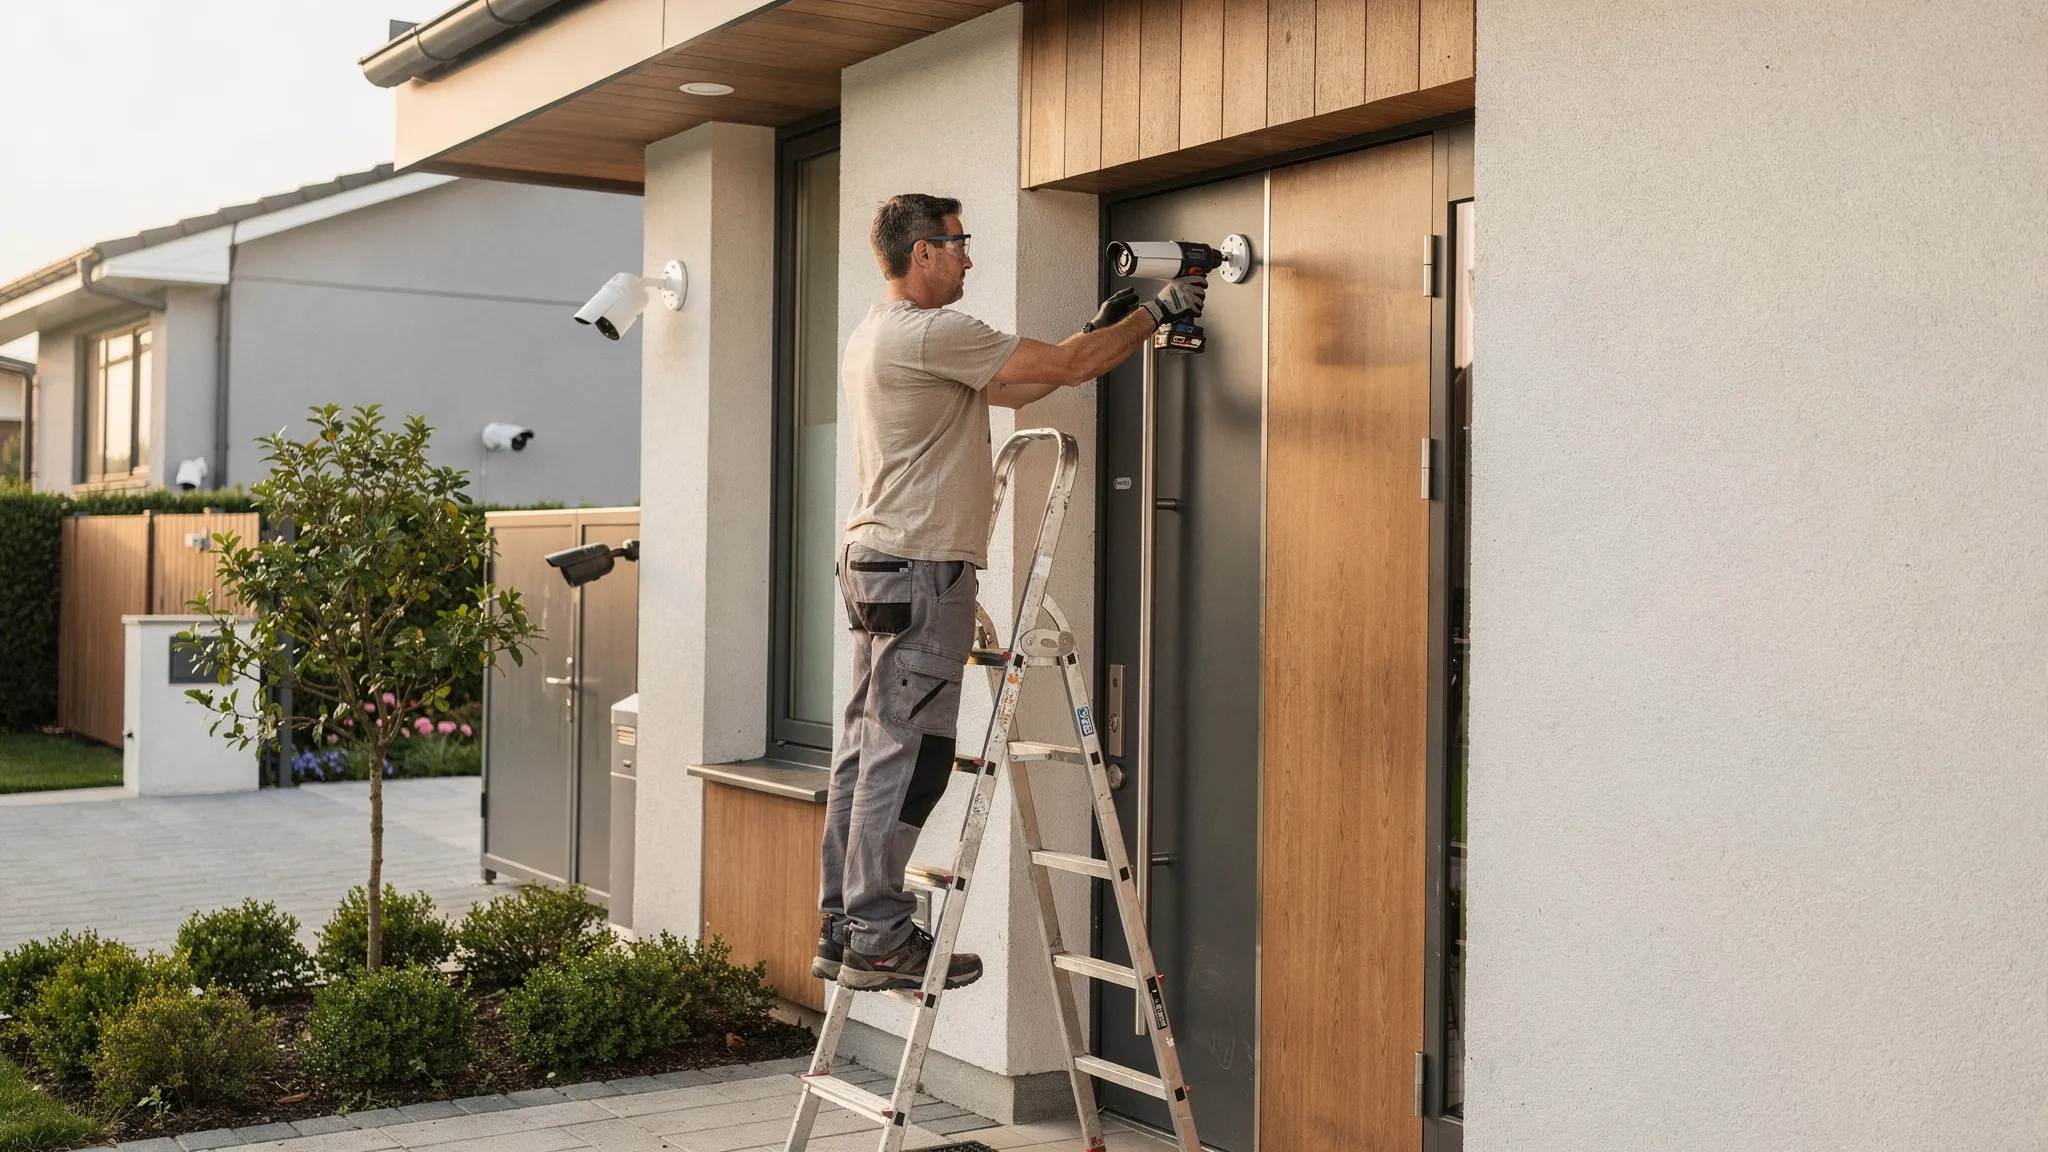
Step 6: mount the camera and route cables
Take your time here. A few millimetres can change the view a lot.
Mark, drill, and mount
- Hold the bracket in place and mark hole positions.
- Drill the holes appropriate for your surface.
- Insert wall plugs if required.
- Fix the mount firmly so it does not shift in wind or vibration.
Route power and data cleanly
Good cable routing is about reliability and appearance.
- Keep cables tight to surfaces using clips or trunking.
- Create a drip loop (a small downward loop in the cable) before it enters the camera or wall, so rainwater drips off instead of running into the entry point.
- Seal any exterior entry holes if necessary.
If you are mounting outdoors, confirm the camera’s weatherproof rating is suitable for exposure. An IP66-rated camera housing is designed to handle typical outdoor conditions, but you should still avoid obvious water paths and insecure connections.
Step 7: power on and complete app setup
Most modern CCTV cameras are managed from a mobile app.
Typical setup steps:
- Power the camera on and wait for it to initialise.
- Add the device in the app and connect it to your Wi-Fi (if applicable).
- Update firmware if prompted (this is important for security and stability).
If your device supports two-way audio, test it early. It is easier to fix mic/speaker settings before you finalise the mounting angle.
Step 8: tune the view (and avoid common night vision problems)
Now you refine the camera’s angle and detection settings.
Use real-world testing, not guesswork
- Walk the path a visitor or intruder would take.
- Review footage in daylight and after dark.
- Check whether faces are visible at the distance you care about.
Fix these common issues
- Headlight glare: reposition so car headlights do not point directly into the lens.
- IR reflection: if the camera sees a bright white haze at night, it may be reflecting off a wall, gutter, or window. Adjust the angle or move the camera slightly.
- Motion spam: narrow detection zones to exclude roads, trees, or busy pavements.
If your camera includes AI human detection and tracking, enable those features after you confirm the basic view is correct. AI settings cannot compensate for a camera that is aimed at the wrong place.
Step 9: set recording rules and retention you can rely on
This is where you ensure evidence actually exists when you need it.
Choose the right recording mode
- If you want maximum evidence coverage, use continuous recording where supported.
- If you prefer to save storage, use motion-triggered recording, but increase pre-record buffering if the system supports it (so you capture the seconds before motion is detected).
Check storage health
- If using a microSD card, use a reputable card designed for continuous writing when possible, then format it in the app/device as recommended.
- If using cloud recording, confirm the camera shows “online” consistently and that uploads are not failing.
Set alerting with intent
The goal is not “more notifications”, it is “useful notifications”. For most homes:
- Enable human-only alerts for outdoor areas.
- Lower sensitivity during windy nights if trees trigger false motion.
- Consider scheduling alerts (for example, quieter during school run hours, stricter overnight).
Step 10: secure your CCTV system (often overlooked)
A CCTV camera is an internet-connected device, treat it like one.
- Use a strong, unique password for the camera account.
- Turn on two-factor authentication if the app offers it.
- Keep firmware updated.
- Secure your home Wi-Fi (WPA2/WPA3, strong router password).
Quick troubleshooting checklist
If something is not working after installation:
- No live view: check power first, then Wi-Fi strength, then app permissions.
- Delayed alerts: check upload speed, signal strength, and notification settings.
- Poor night footage: reposition to reduce reflections and bright light sources.
- Missed events: confirm recording mode, storage status, and motion zones.
Frequently Asked Questions
How much does CCTV camera installation cost in the UK? DIY installation can be low-cost if you already have tools and nearby power, but costs vary widely depending on camera type, cable runs, and whether you choose cloud recording or professional installation. For complex wiring, outdoor power work, or multi-camera systems, a professional quote is usually worth getting.
Where is the best place to install a CCTV camera outside a house? Most homes get the best security impact by covering the front door, driveway, and back door first. Position cameras to capture faces at entry points and avoid pointing directly at roads, neighbours’ windows, or strong light sources.
Is it legal to have CCTV on your house in the UK? Generally yes, but if your cameras capture beyond your property boundary you may have data protection responsibilities. Follow the ICO domestic CCTV guidance and minimise coverage of public areas and neighbours’ property.
Should I choose cloud or local recording? Local recording (such as microSD) is simple and often cheaper long-term, but footage can be lost if the camera is stolen or damaged. Cloud recording stores footage off-site but may require a subscription. Many people choose both for resilience.
How high should I mount a CCTV camera? High enough to reduce tampering and still capture usable facial detail. If it’s too high, you may only record the top of someone’s head. A practical approach is to mount above typical reach and then test footage by walking through the area.
Make your installation easier with the right camera
If you’re planning a DIY CCTV camera installation, using a camera designed for both indoor and outdoor monitoring can simplify the job and reduce rework. Nakavision’s range includes the Nakavision C1, a dual-lens home security camera with features such as AI human detection, night vision, pan/tilt and zoom, two-way audio, and cloud and local recording options.
Explore the camera and specifications at Nakavision and choose a setup that matches your property layout and recording needs.
Leave a Reply